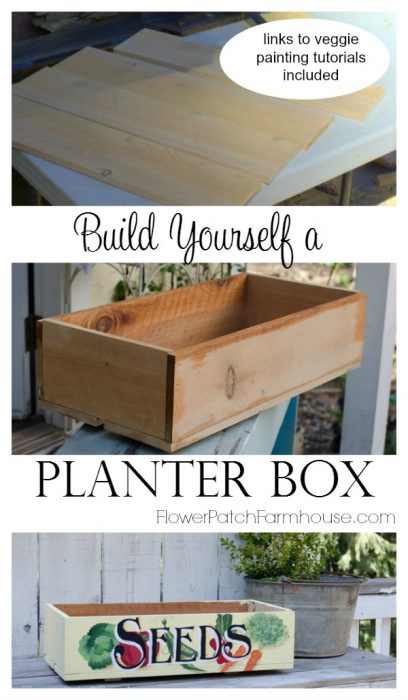
DIY Planter Box or Crate
DIY Planter Box or Crate from Cedar Fence Boards. This easy woodworking crate can be used so many ways.
Building this crate is a great introduction to simple woodworking. This DIY planter box or crate from fence boards is inexpensive and being cedar it holds up to the weather.
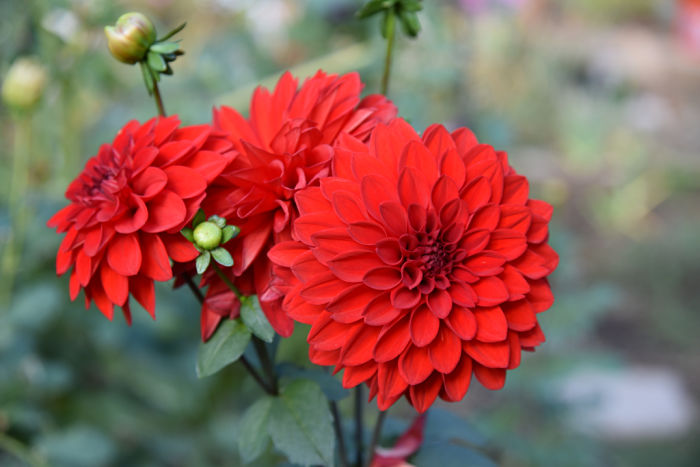
Recently, I shared how to propagate Dahlia’s from cuttings and I showed the tubers planted shallowly in this wood crate.
I am not proficient at woodworking but I can build this simple crate and so can you.
Simple woodworking crate

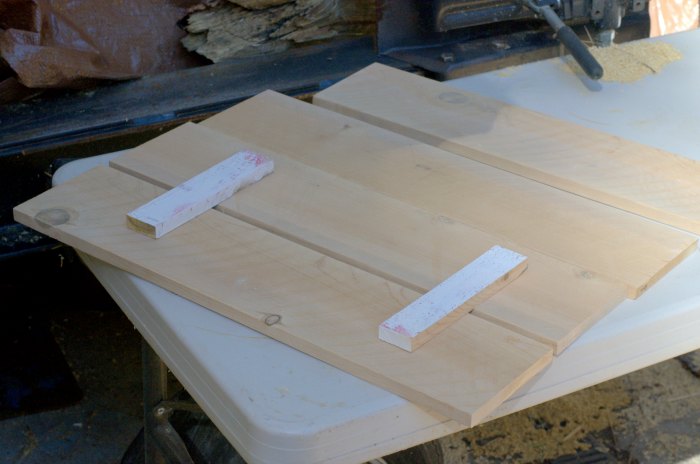
I cut 4 boards to size (you can choose your size). My box is 24″ x 12″ so these 4 boards are 24″ long.
(this post contains affiliate links, please see disclosure for more info)
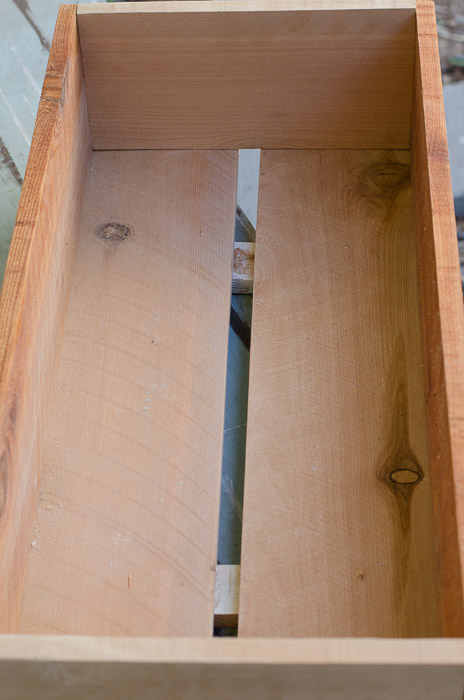
Attach some scrap wood to the two bottom pieces so it would make “feet” for my box, better drainage. You will notice there is a gap between the boards, that is also for drainage.
The fence boards are 5.5 inches wide so the box will have a depth of close to 6 inches. The thickness of each boards is about 1/2 an inch but be aware that cedar fence boards vary from board to board so don’t count on a squared up project.
Here is the box all put together. You can see the gap in the bottom. The side pieces are about 11″, and sit inside the front and back piece.
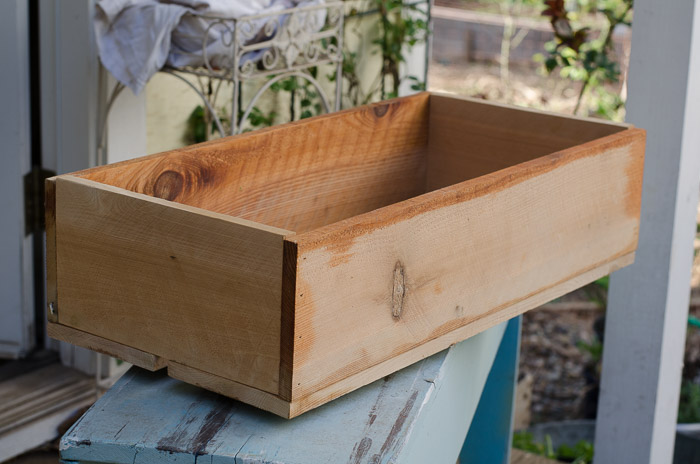
I used my Ryobi Airstrike to attach everything together.
I LOVE that thing. You can also just use nails and a hammer or a screw gun. If you use screws be sure to pre-drill your holes to prevent splitting.
For other DIY wood boxes I have built see this post DIY Rustic Box and this post for a tool box version DIY Rustic Toolbox.
You will notice in the photo the wood looks a little darker inside. That is organic tung oil or a cutting board oil. It is safe for contact with food.
I painted it on the inside of the box to provide a protective finish so moisture will just run off. I did not put it on the outside as I am going to paint that.
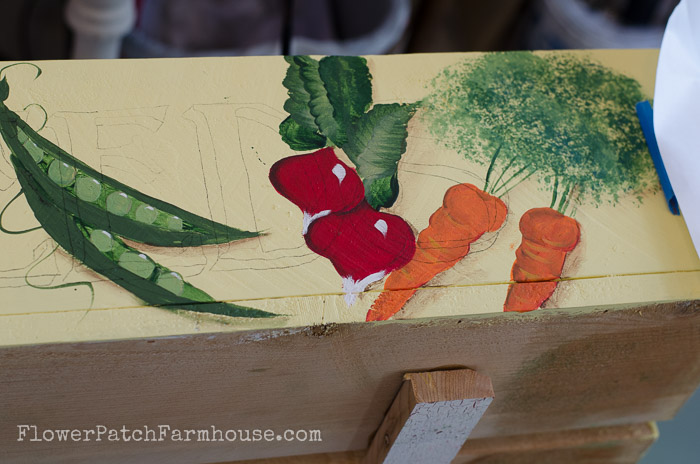
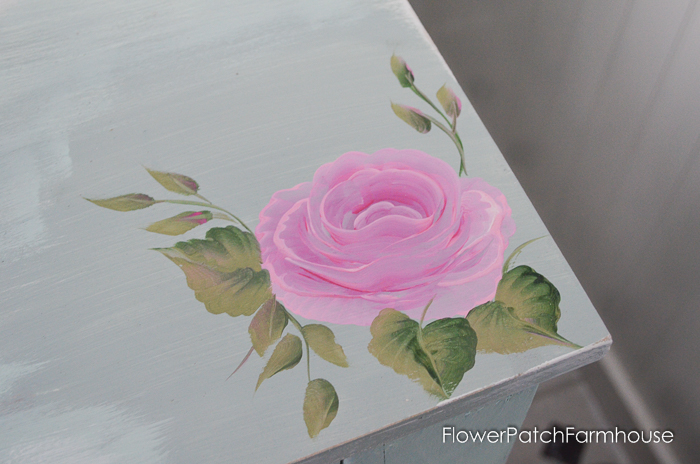
I had fun painting this using the same motifs as I presented in my veggie painting tutorials.
Click here to go to my Learn how to paint website and choose from a variety of designs to paint on your box or click on the link in my navigation bar.
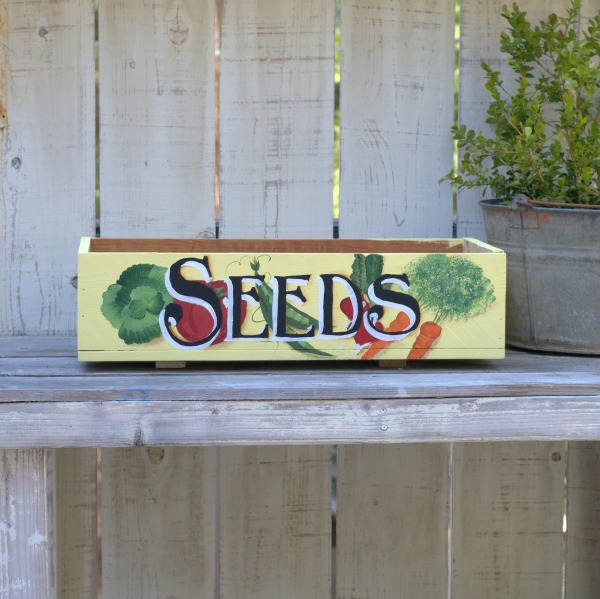
I painted the exterior of the entire box with DecoArt Chalky Finish paint in Delicate. Then I added my hand-painted veggies.

Here are the veggies before I added the lettering.
This is the first half…
and the second.
And here is the finished planter box or crate.

I finished the outside of the box with an exterior Satin water based varathane.
Happy Building and Painting!
I also this for a Back Door Herb Garden, check it out HERE.

If you enjoyed this please PIN and share

Thank you, Alexandra! It was fun to make and now it is just as fun harvesting herbs from it. Had fresh cilantro on my salad today!
I’ve been following along with the paintings of the pieces. The finished box is so cute!
I was going for the vintage seed packet vibe, they always seemed to have that dimensional look. 🙂
Thanks so much, it was more than fun too!
Adorable!
this is adorable, I love the font you used and the way you shadowed the letters!
I would be thrilled if you could send me that PDF. Then I don’t have to try and figure out just the right shape. Thank you so much! I have been toying with the idea of doing painting classes here in person. I am a little skittish. I don’t know why but I am nervous about doing it. I can clear out my studio and fit up to 5 students comfortably. I like the idea of smaller classes like that, I can give more attention to each person. And with holding then in the studio I would save the $$$ on renting a building.
Aw, thank you Pam for the kind words. Everyone loves your little tool box. I cut the ends with a scroll saw and Bob cut the other parts on the band saw. I can send you the end pattern in pdf format if you’d like to have it. I so look forward to all you rustic woodworking. They’re so easy & fun to make. Now if I could only get the hang of painting roses…lol.
Diana
And what is great is it is so easy to do and you don’t have to make sure everything squares up, all the plants obscure the spots that are wonky. 🙂
And somehow I know yours will turn out better. 🙂 I am still wanting to do a toolbox with the sides like you guys did. I love that shape.
I thought with it being so brightly painted it would look better with just greens in it and planted it with herbs. I am planning another for micro greens.
What a cheerful, colorful planter! :0) Just beautiful, even without flowers, etc.
Love the new planter box! I’m sure I’ll have one before this day is over. But first a trip to Home Depot for more fence boards! 🙂
It turned out perfect, how cute 🙂