DIY Workbench My Favorite DIY so far!
My DIY Workbench
A few years back I built myself this workbench and I absolutely love it. I had very little help from my hubby who was busy with other tasks.
This is a work horse and I use it nearly daily when I am in my studio painting. It is counter height to save my back especially when I am wrapping items to ship. For those of you in need of such a bench here is how I did it. Without further ado, my diy workbench!

Plans
I started with a plan from Ana-White.com it is a plan for a KITCHEN ISLAND that I modified to fit my needs.
Mine is made to fit under the windows of my studio cottage, so about 8 feet long. I use every single inch!
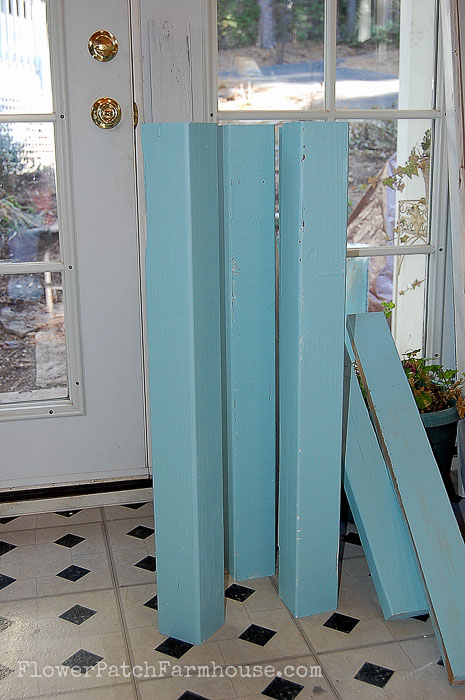
I used 4 x 4’s for the legs but there are other ways to make legs if you don’t want to use such heavy parts. Here is another great bench that could be modified for this..DIY Miter saw bench.
Build
I pre painted many of the parts before putting them together, I just figured it would be easier but it isn’t necessary.
I started with the legs cut to size for the height I wanted calculating in the table top for the finished dimension.
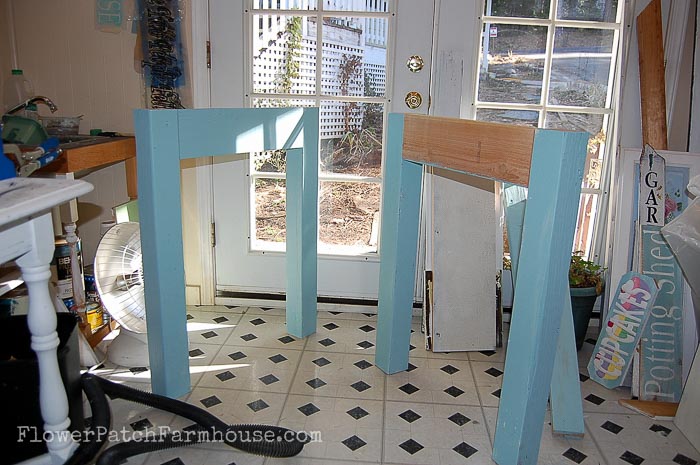
Aprons
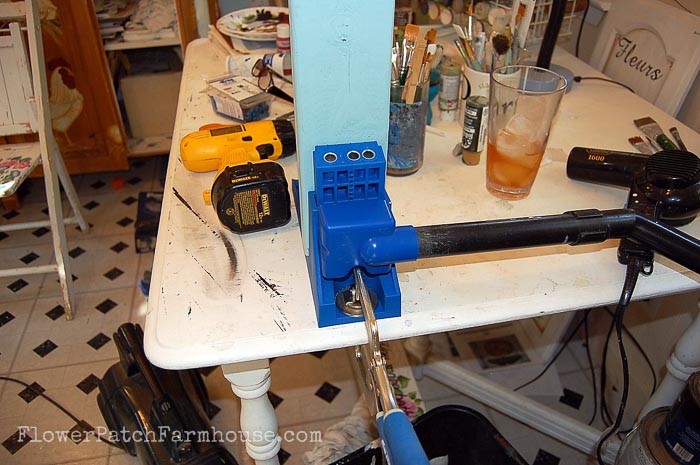
I used a Kreg Jig to put my DIY workbench together and it was well worth its purchase price.
Here I attached the side aprons first..I did not bother painting the part that would not be seen under the table.

I attached the second side apron and stood them up to realize I had put the Kreg Jig holes in the painted side, oh well, I am used to fixing my goof ups. It will be easy enough to paint this side later.
With this Kreg Jig kit there was an added attachment I just love. It is a little dealy bobber that lets me attach my vacuum hose to the Kreg Jig and as I drill the holes the sawdust is cleaned right up. Now I don’t have to worry about pesky sawdust flying all about my studio when I build things in its heated comfort.
Up next was attaching the front and back apron pieces to the sides. These I failed to pre paint but no worries, easy enough to do later.

You can see I was working on cramped quarters but it still worked.
Bottom Shelf
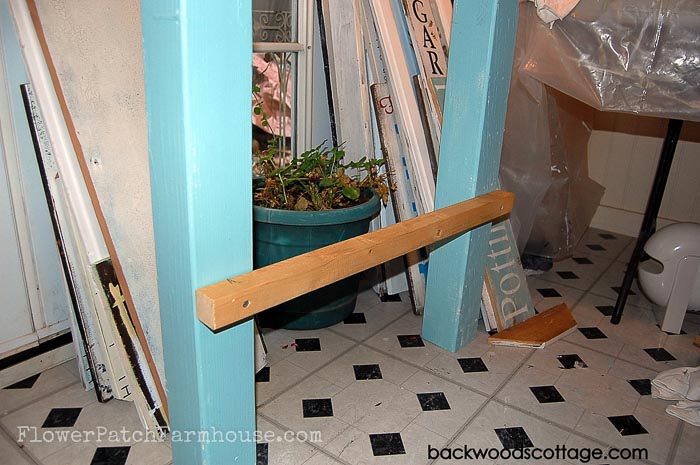
For the bottom shelf of my DIY workbench I wanted it to be high enough I could fit this basket and other storage bins under so I used the basket to measure for it.
Oh so very high tech. I used the spare board here to give me the extra inch or so. I made my pencil mark and that was it.

I attached the supports for the shelf. I just screwed them on, no need for the Kreg Jig here.
The shelf is just a piece of scrap plywood I had and so is the top. I painted the shelf blue like the legs and the top white for contrast.
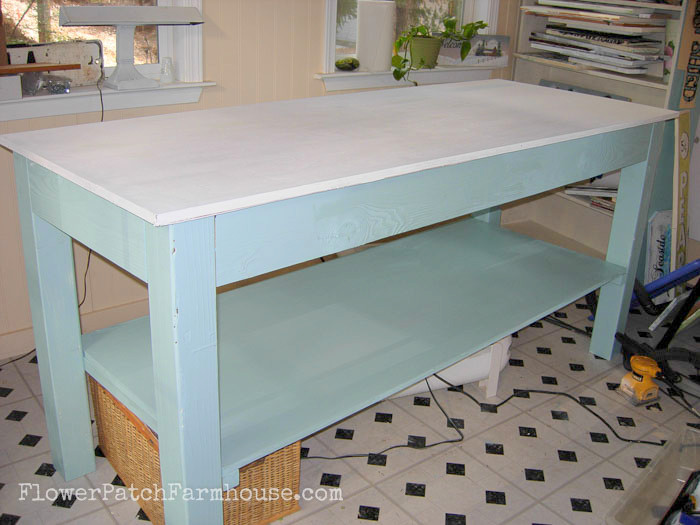
And there you have a great work bench/table. Now that I am considering clearing out my studio cottage for a place to hold painting classes I will need to move this to the garage where it will still be a great work table bench.
Now I need to build a table for my students. That should be fun too. It will most likely be the same style, just a standard table height instead and no shelf beneath.
Happy Building!
Click the Pin It button for a lovely pinnable image!
More You May Enjoy
How to Build a Rustic Toolbox
How to Build a Garden Bench
Build an Easy Garden Arbor


Actually I have done some and moved them from this site over to my new one pamelagroppe.com
Check it out if you like. It is a work in progress and I am slowly adding to it.
I used to do tole painting and had great fun-have you ever thought about pay for classes on the internet with something similar. We did have a sheet of paper with a drawing on there.
It is and the result is very satisfying and a great place to work.
It is a great workhorse too. It gets used every single day!
I would love to be able to make one of these, so awesome. And yours looks so cute.
Looks like a great weekend DIY project!
I do love the blue as well, it just made the studo/cottage that much more inviting.
It is a great asset, one of the best things I have built!
Awesome workbench! Thanks for showing how you did it. I’ll bet it’s been a great asset to you. 🙂
Love the bench, and particularly the color. Give me blue anything!
Jane
Yes, prepainting did help, it can get awkward once the bench is put together but still doable. this would work great for a sewing area!
The great thing about this design is it is easy to adjust the size to fit your need.
Thank you Peggy. It has been a huge help in my studio to have this work bench/table.
Extra work space! You can never have enough. The Kreg Jig Kit is genius! I wish I had the space for a bench this size! Great tutorial!
Great work I love the workbench. I would like to miniaturize one for myself. Thanks for the great idea.
Your workbench came out great. I like that you painted some of the pieced prior to assembly, I’m sure it saved you some time in the end. I’d like to plan a project like this for my sewing area, it looks like a great work surface plus storage. You did a great job!
It has been my favorite piece of furniture in my studio cottage, for sure.
You did a fantastic job, and I love the color. Every gal needs a workbench for sure 🙂