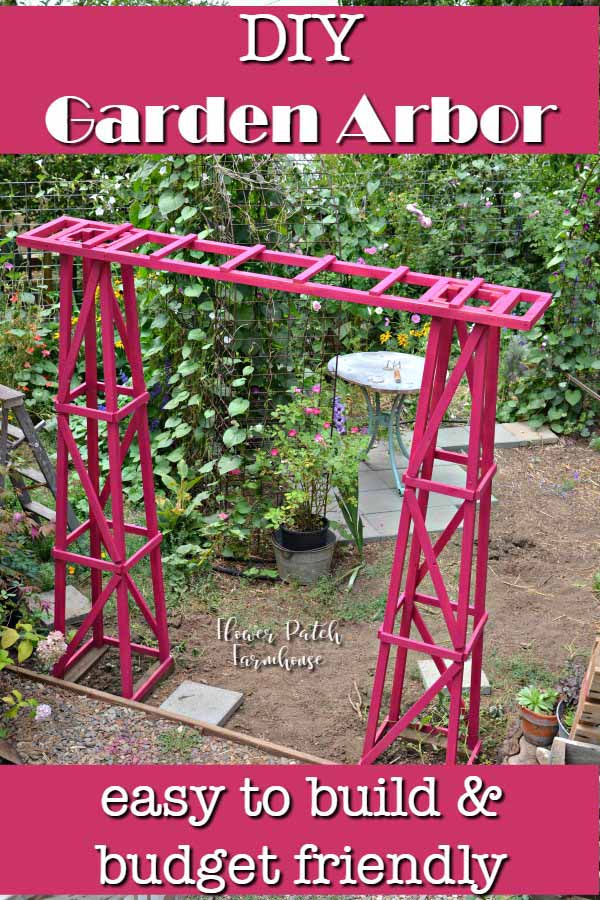
Easy DIY Garden Arbor
Easy DIY garden arbor for your Cottage Garden. Easy to build and it is portable too.
This easy DIY garden arbor is made using the same ideas as the super easy obelisks we built and I shared here.
(this post would’ve been way too long if I had attached all the step-by-step photos, they are included in the PDF available)
easy to build
DIY Obelisk Arbor Plans
Get the step-by-step photo plans with schematic so you can build your own garden Arbor. The obelisk sides create a stable base and it is easy to move!

Garden Arbor Plans
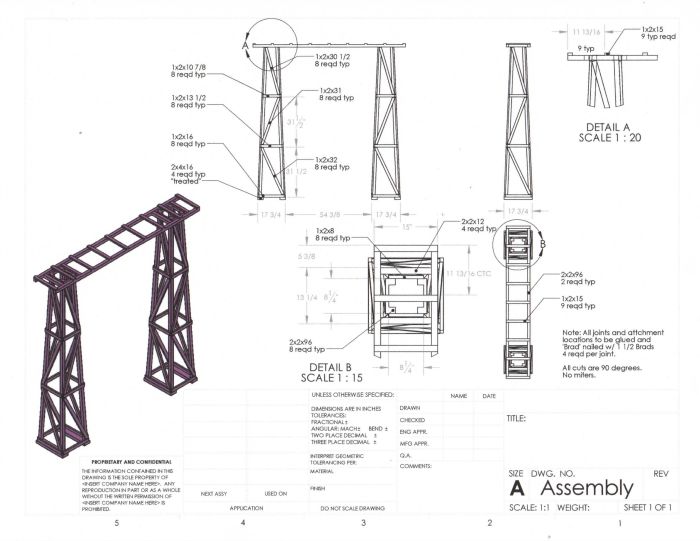
I have been so anxious to get this to you. I had to wait on dimensions and a drawing from the builder (hubby). Then when I got the drawing it is in a very technical format.
He is an engineer and thinks everyone can easily read drawings like this. If you study it you can make out what you need for materials and make your cut list.
I was going to build this all myself but when I told my hubby he would need to bring home my Ryobi nailer and miter saw he quickly decided to make it for me instead.
I think I am just going to have to buy myself another nailer. He also took the photos with his phone on the fly and some are not very clear so bear with me on this. The only remedy I can think of is to build another myself and do the photos for you but until then here she is, blurry shots and all.
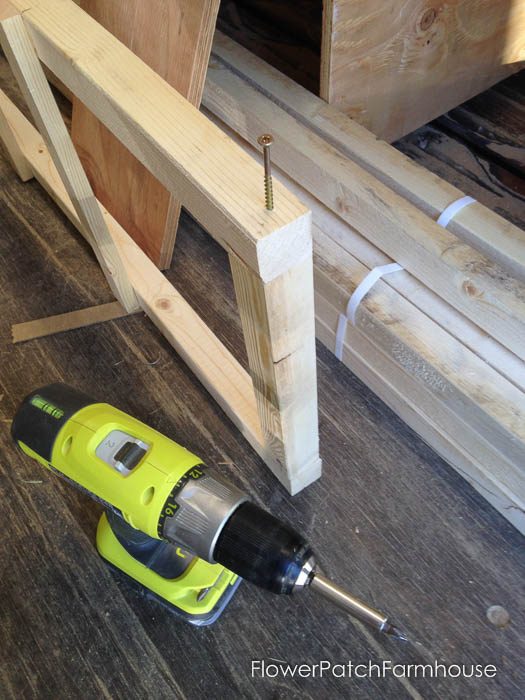
The Basics to Build the Garden Arbor
Start with two 8 foot long 2″ x 2″s and four 1″ x 2″s cut to their respective lengths. (please see drawing for dimensions) This is the 1 x 2″s cut to size.
(always double check everything, you can scale this as you see fit)
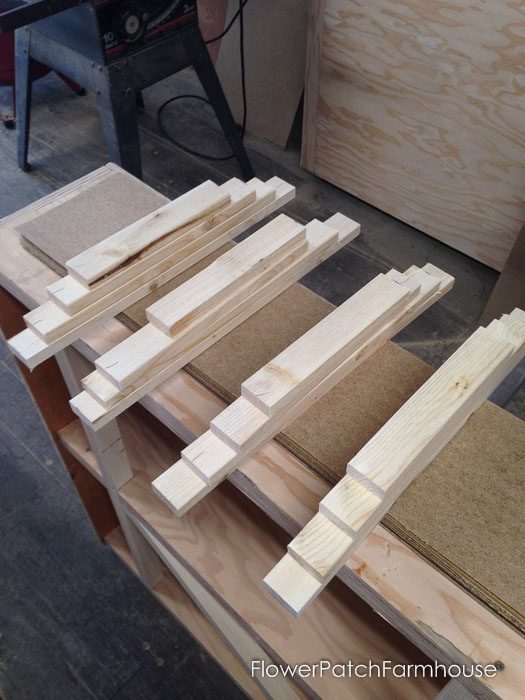
Create Ladders
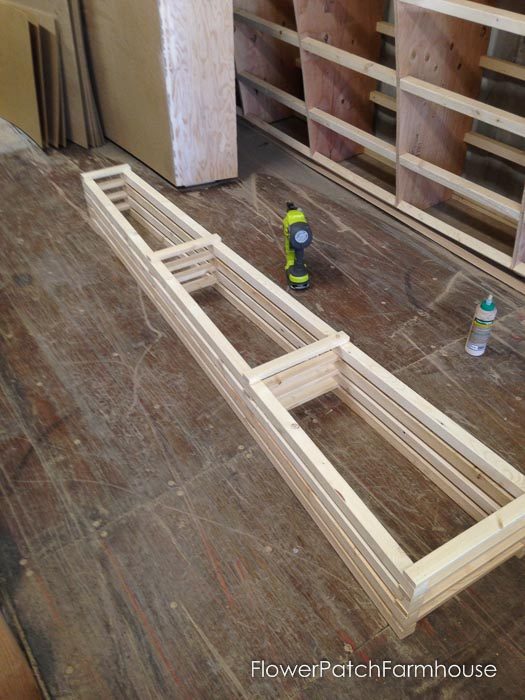
Glue and nail them into a ladder-type shape.
Make four of these ladders, it makes it go faster when you make one on top of the other as a guideline.
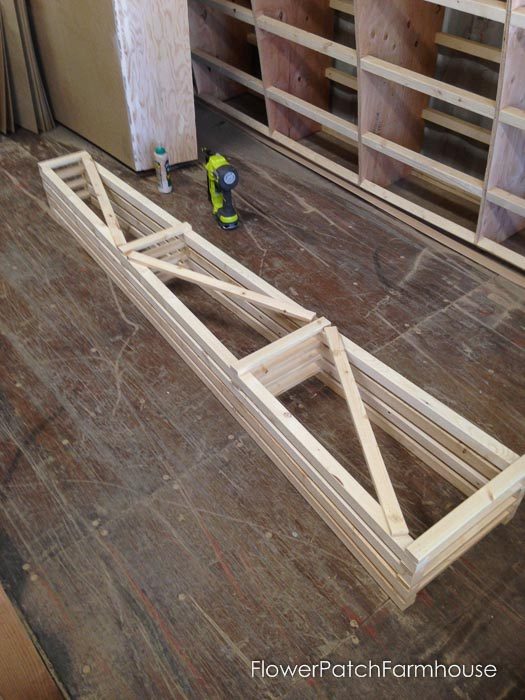
Add the cross 1 x 2’s to your ladders.
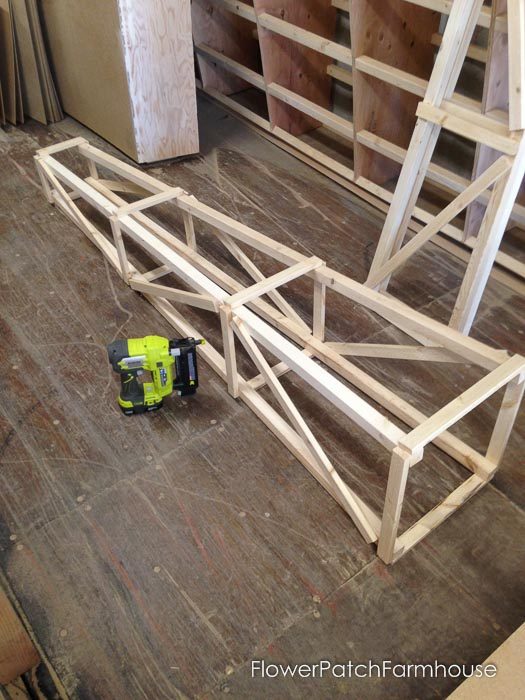
Lie two “ladders” on their sides and attach the cross pieces. Now you can really see the obelisk taking shape.
DIY garden arbor top piece
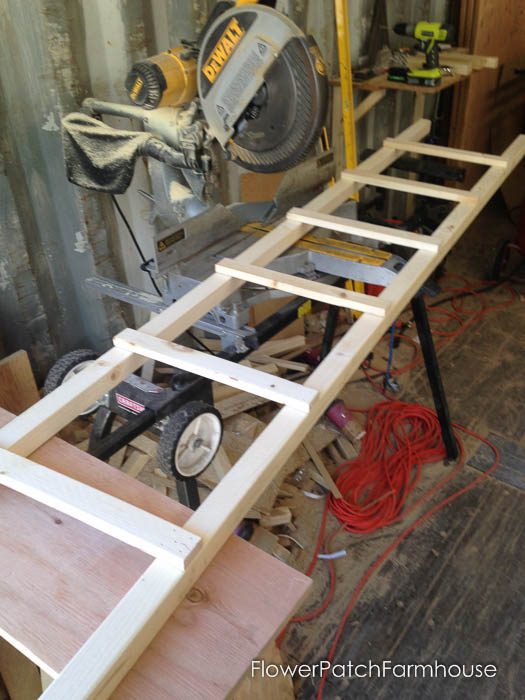
The top piece is also a ladder made from two 2 x 2″s and the 1 x 2″s.
The ends are 2 x 2’s, he pre-drilled and screwed them on for added stability.
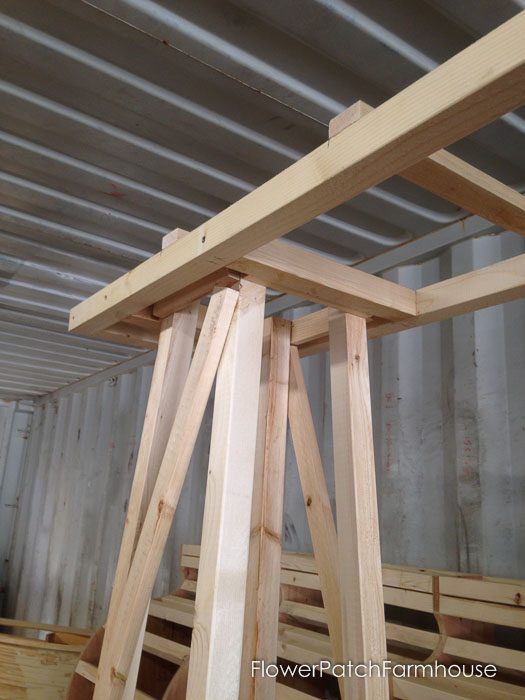
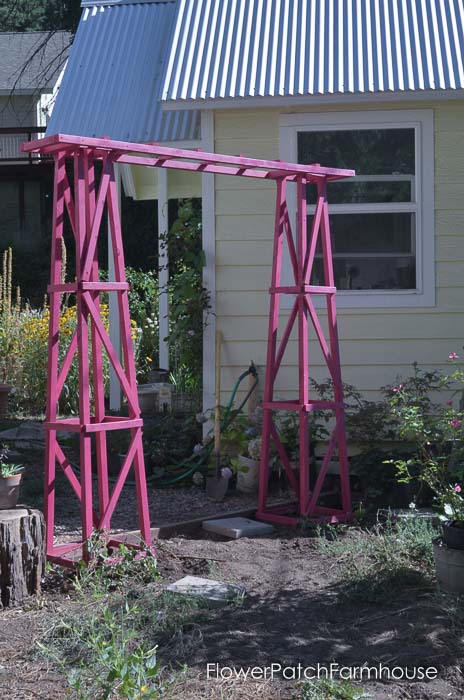
He created a framed inside of the ladder to set on top of the obelisks to keep it steady and create the arbor.
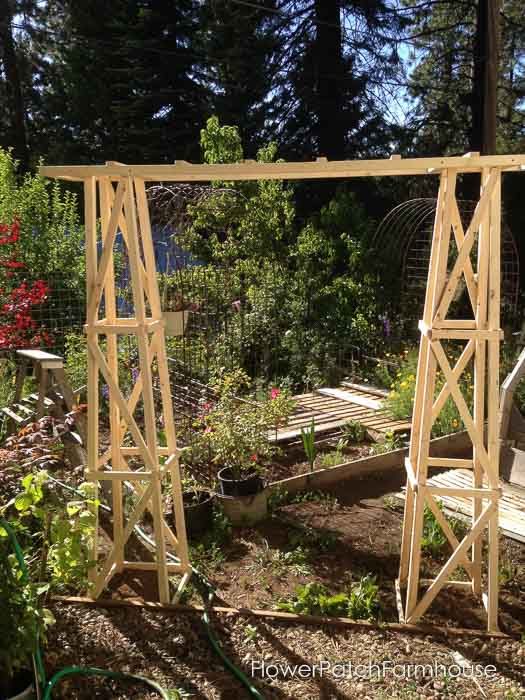
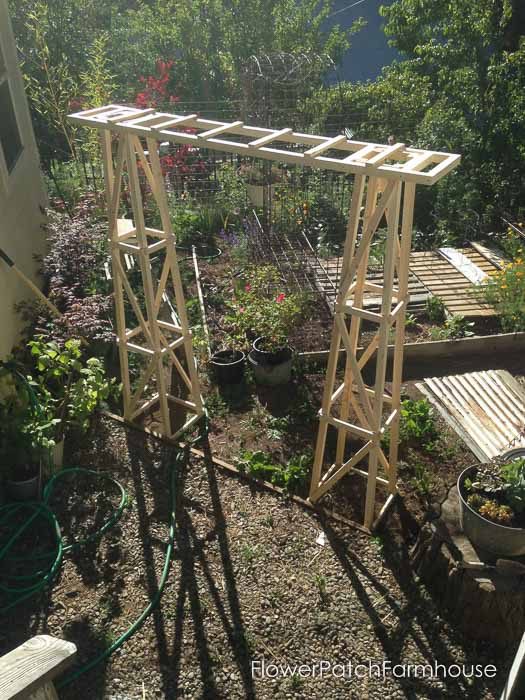
It is an awesome design. I can take the top piece off whenever I want to move the arbor if I need to.
In this photo you can see the 2″x 2″ framework around the top of the obelisk.
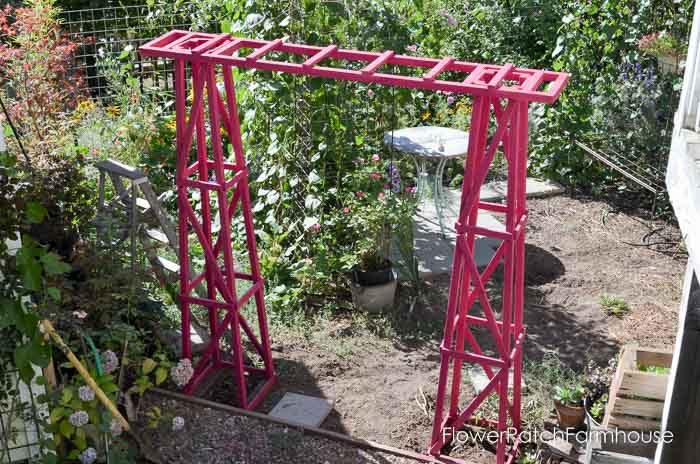
These photos don’t show it but the bottom has a treated 2 x 4 cut to size so the untreated wood is not touching the dirt.
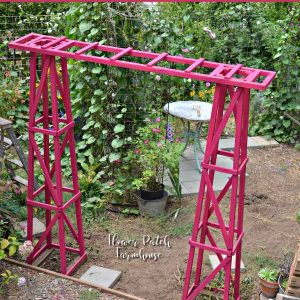
All painted up in her magenta gorgeousness! (update: I have painted it white now but I am thinking black would make a great statement.)
Our estimation for how much the materials for this project ran would be $50 to $60. Not bad for such a grand statement in the garden. (since this was posted the cost of lumber has dramatically increased and varies by location)
easy to build
DIY Obelisk Arbor Plans
Get the step-by-step photo plans with schematic so you can build your own garden Arbor. The obelisk sides create a stable base and it is easy to move!
FYI, someone mentioned that there is an error in the schematic but we cannot find it comparing it to our build so please always check your work as you go for dimensions.
Check out all the DIY Decor and Garden Features you can build!
Next on my wish list is to build an arbor like this: BHG Garden Arbor
Happy Building! (and gardening)
Hi, I’m Pamela
With 45 years of hands-on gardening experience, I love sharing practical tips, proven techniques, and inspiration drawn from my own gardens. My goal is to nurture your confidence, spark your passion, and help make every step of your gardening journey more enjoyable.


I am a real novice but I am definitely gonna try this. Thank you for the instructions and pics!
Thanks for the plans! It came out great.
love this. great idea
This is a really pretty and different-from-usual arbor! Something I think would keep myself and my son busy for a little bit! Thank you so much for sharing it with us all
I am so glad you like it. If you build it let me know if you run into a wrong measurement on the plan, some one said it was off on the top rail but I cannot find the discrepancy when compared to the one we built. Another pair of eyes may be able to find it for me. I should just build another but have yet to do that.
This looks perfect for a space I’m looking at thought of arch with concrete posts with ladder on top
Now looking at this will make the space not so closed off.
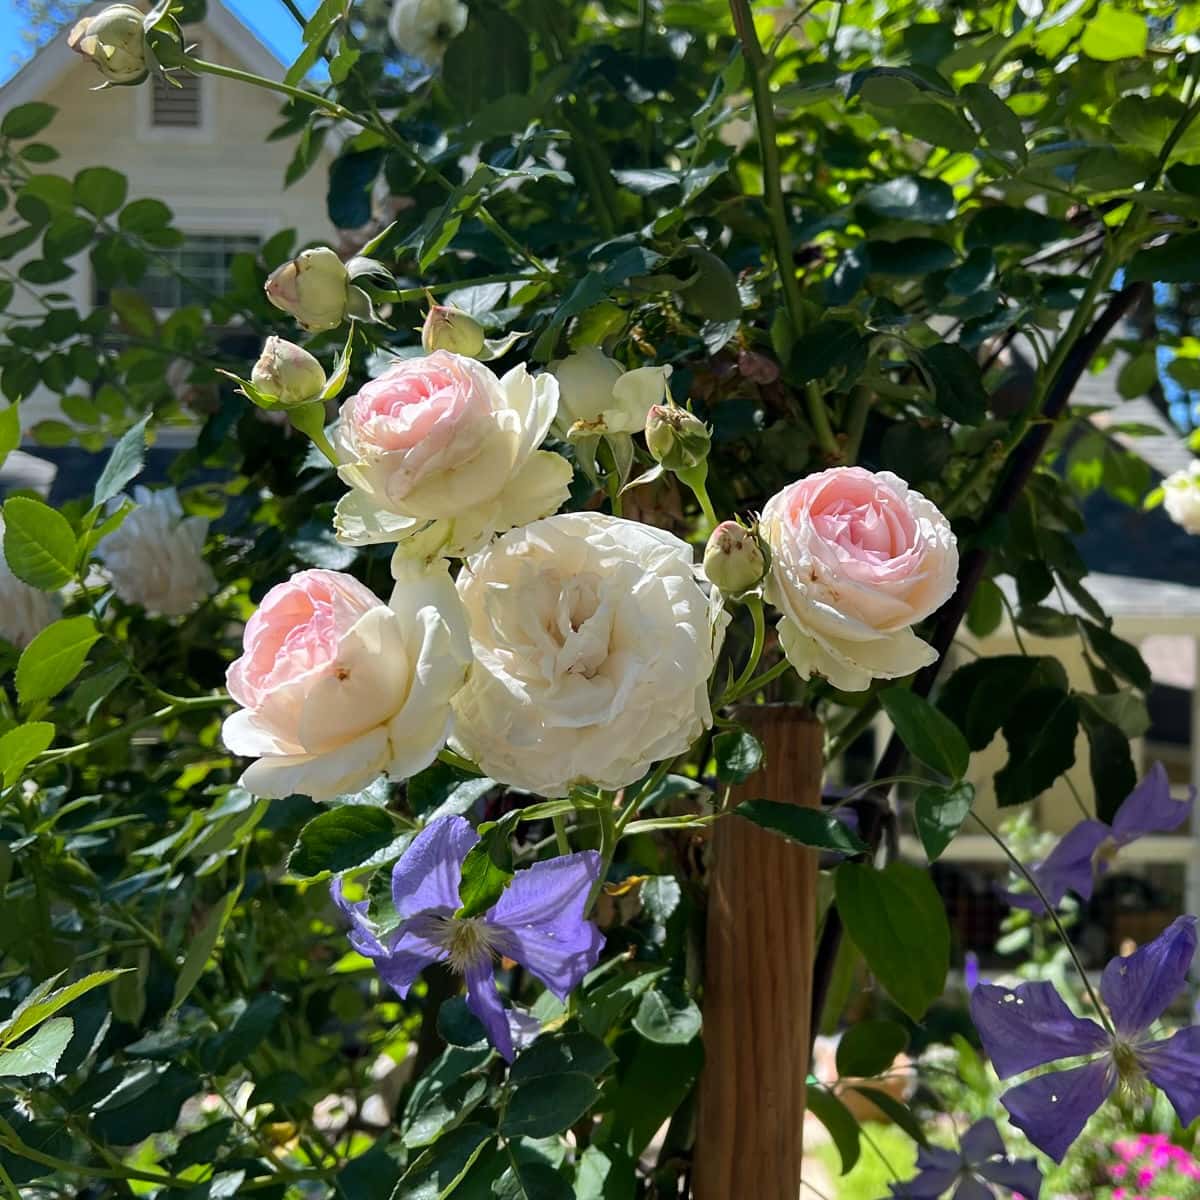
Rustoleum spray paint in Magenta. It is a great color and I do love it. I am thinking of getting a white flowering vine to climb it to accentuate the magenta not detract from it.
You are most welcome! This is such a great arbor, I am loving it more and more and can’t wait to build another to go across my walkway in the side garden!
What color//brand paint did you use? I love the color!
This is so very awesome! And I have a guy at my house that can read those plans! Thank you for a great project.