No-Transplant Winter Sowing
No-Transplant Winter Sowing: An Easy Way to Grow Flowers
Today I am going to share with you the easiest winter sowing hack of all. So come on along and get started on your garden the super lazy way!
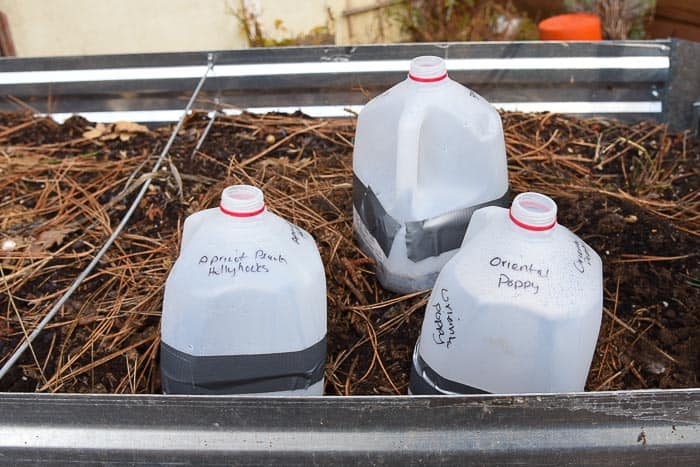
Winter sowing is one of the simplest and most budget-friendly ways to start flowers from seed. Many gardeners are familiar with using milk jugs and other containers, but did you know there’s a way to winter sow without needing to transplant later?
This method allows seedlings to stay exactly where they sprout, saving you time and effort in the busy spring season.
This post contains affiliate links. If you make a purchase after clicking a link I may make a small commission at no cost to you.
Why Try No-Transplant Winter Sowing?
Traditional winter sowing involves planting seeds in containers like milk jugs, which act as mini greenhouses. While effective, it requires transplanting seedlings once they outgrow their containers and are ready for the final spots in the garden.
The no-transplant method simplifies the process by sowing directly into larger containers or garden beds where the plants will mature. Transplant shock is avoided which is always a good thing.
This approach:
- Reduces the need for transplanting, which can be time-consuming.
- Creates stronger, more resilient plants by allowing them to establish undisturbed.
- Saves money by using existing soil and eliminating the need for extra pots.
What You’ll Need
For this method, you’ll need:
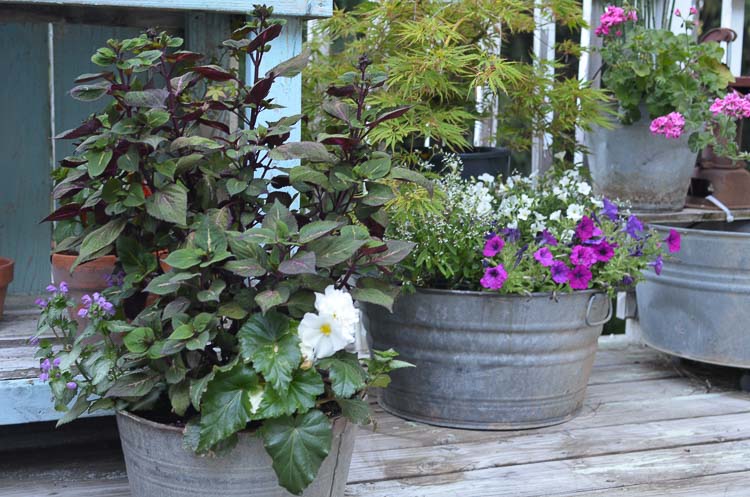
✔ A large container or raised bed (galvanized tubs work well)
✔ Seeds of your choice (Snapdragons, Poppies, Echinacea, and more)
✔ A light layer of compost or potting mix
✔ A cover to prevent birds and to hold up next item (such as a Dollar Tree basket)
✔ Plastic sheeting and a stone or weight for securing it later
I share a video at the end of this post where I show you how it is done.
Step-by-Step Guide
1. Choose Your Container
I like using galvanized tubs that have housed summer flowers, I love galvanized tubs and buckets but you can use containers that you have on hand. Instead of removing old plant roots, I leave them to decompose naturally, enriching the soil. Any large container or raised bed will work. If you wish to remove and refill the container with fresh potting soil that is just fine.
You can also do this in smaller containers if you wish to sow just a few seeds.
(I will remove the roots only if they are filling the pot completely and causing an issue of hardening the soil into a clump)
2. Prep the Soil
Scruff up the surface of the soil to aerate it. If needed, top it with a fresh layer of compost. Avoid using seed-starting mix—it dries out too quickly for outdoor sowing. I try to use as little peat moss or coconut coir as possible though in the United States is it hard to find potting mixes that don’t contain them.
That is why I usually try to make my own.
Easy DIY Potting Soil
3. Sow Your Seeds
Scatter the seeds directly on the surface. Some seeds, like Snapdragons, require light to germinate, so press them gently into the soil without covering them completely. If using older seeds, sow more heavily to compensate for reduced viability.
Read the seed packet information on how deep to sow your seeds. Different plants like different conditions.
How to Read Seed Packets
4. Add a Cover
Instead of enclosing it in a milk jug, place a breathable cover over the container or garden bed . A Dollar Tree basket works great as a frame.
During winter, leave it uncovered to allow natural moisture from rain and snow. When temperatures begin to rise, drape plastic sheeting over the top and weigh it down with a stone to create a greenhouse effect.
Or if you prefer to start with a plastic cover, perforate the plastic sheeting so rain and moisture can penetrate to the soil. This can also help it vent if it gets too warm.
Most of the time, by the time it is warm enough to need venting you can remove the plastic cover entirely.
I have also used clear Sterlite or other storage tubs to use as a greenhouse roof over the area. Some poke holes in it but I usually just prop one side up on a small stick or stone to let air in as needed. In the video, I show how I don’t cover the entire area with the tub so the moisture from the surrounding soil will be enough to keep the plants going. No need to make holes in the container. (video link below)
No-Transplant Winter Sowing for Perennial Flowers
This method works beautifully for perennials like Echinacea, Larkspur, and Foxgloves. These seeds benefit from winter stratification (exposure to cold) and will germinate when conditions are right.
All the best garden tips
21 Perennials to Winter Sow
Over the years, I’ve discovered a fantastic list of perennials that thrive with this method, and I’m excited to share them with you.
For poppies, I scatter seeds directly into my flower beds before a heavy rain. The rain helps press the seeds into the soil, mimicking the natural way they self-seed.
Want more info on growing Poppies, I have got you covered!
A Few More Tips
- If seedlings emerge too thickly, transplant them in small clumps to other locations rather than individually.
- Use raised beds as “nursery beds” to start plants in a controlled area, then move them later. (it doesn’t have to be a raised bed, you can use a cleared bed in the garden)
- Organic compost creates stronger, more pest-resistant plants compared to synthetic fertilizers.
Create Compost in Your Garden
Final Thoughts
No-transplant winter sowing is a fantastic way to get an early start on your garden with minimal effort. Whether you’re sowing Snapdragons in tubs or scattering poppies in your flower beds, this method makes it easy to grow a thriving garden without the hassle of transplanting.
Have you tried no-transplant winter sowing? Let me know your experiences in the comments!
Happy Winter Gardening!
Hi, I’m Pamela
With 45 years of hands-on gardening experience, I love sharing practical tips, proven techniques, and inspiration drawn from my own gardens. My goal is to nurture your confidence, spark your passion, and help make every step of your gardening journey more enjoyable.