How to Propagate Coleus
How to Propagate Coleus Plants: A Beginner’s Guide
How to propagate coleus, fast, easy, and rewarding!
In our beginner-friendly guide on propagating coleus plants, we delve into the simple methods of growing these popular plants through stem cuttings and seeds. You will learn from this detailed, step-by-step approach that covers everything from the necessary materials to the environmental conditions conducive to successful propagation.
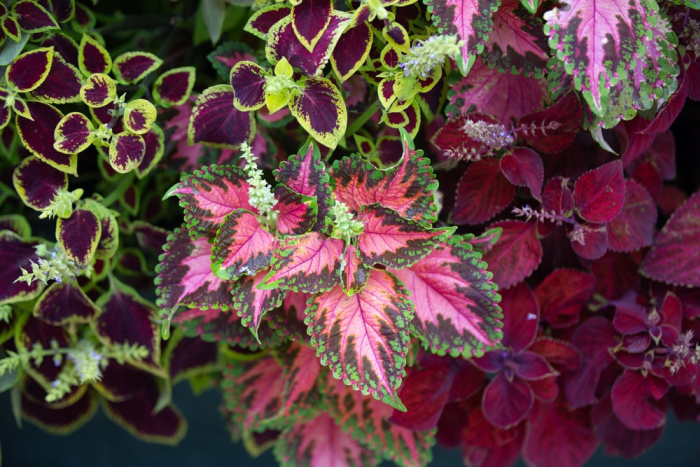
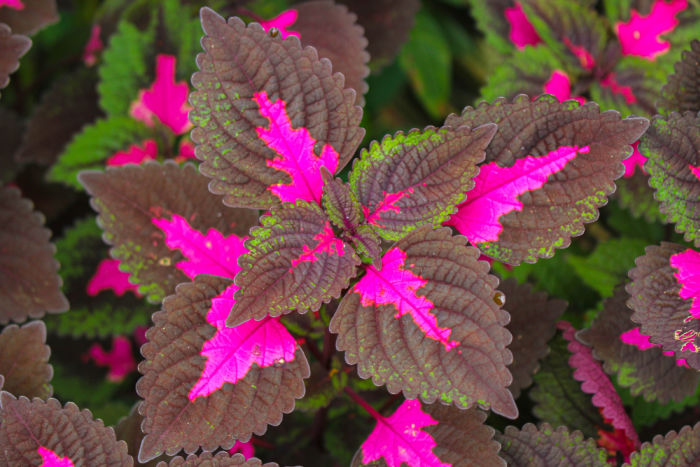
If you’re looking for a fun and easy gardening project to fill your flower beds, coleus propagation might be just what you need! Coleus is a vibrant and versatile plant, known for its beautiful, colorful foliage that can brighten up any space, indoors or outdoors.
This post contains affiliate links. If you make a purchase after clicking a link I may make a small commission at no cost to you.
Not only is it visually appealing, but it’s also incredibly easy to propagate, making it a perfect project for gardening beginners. In this blog post, we’ll walk you through the step-by-step process of propagating coleus plants in two different ways: using cuttings and seeds.
There is no real best time to do this, you can take cuttings from a healthy coleus plant any time of year. Some will say Spring is the best but if you keep them indoors as house plants and they have good light you can propagate as you please. Remember to always cut off the flower stalks. Flowers are how they go to seed and then die.
Propagate Coleus Cuttings
What You’ll Need
- Sharp scissors or garden shears (like these nippers)
- A glass of water or a pot with moist potting soil (sometimes I make my own)
- Rooting hormone (optional)
Step-by-Step Process
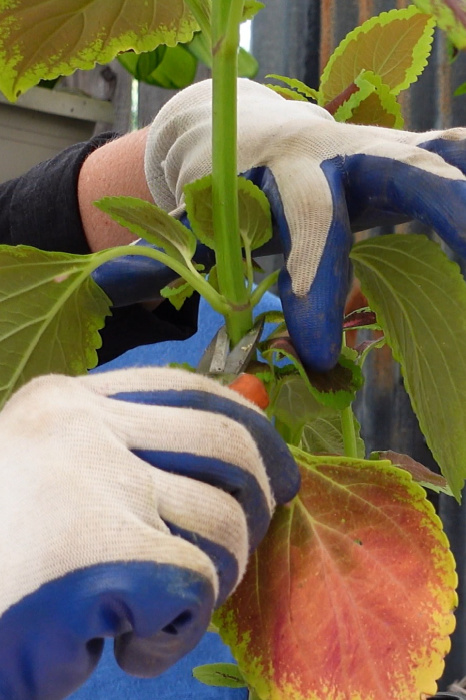
Choose a Stem:
Look for a healthy, mature coleus plant and select a stem that is at least 4-6 inches long. Make sure the stem has several leaves but is not flowering. (sometimes I use flowering steps too, I just cut off the blooms)
We use mature coleus plants to make new plants, when you cut a stem from them they do not suffer but branch out, get fresh sets of leaves, and grow bushier.
Cut the Stem:
Using your clean pair of scissors or garden shears, cut the selected stem just below a leaf node (the point where leaves grow from the stem). It’s important to make a clean cut to avoid damaging the parent plant.
Prepare the Cutting:
Remove the lower leaves from the bottom 2 inches of the stem. This area will be submerged in water or buried in the soil of the small pots. If you have rooting hormone, you can dip the cut end of the stem in it to encourage root growth, but this is optional.
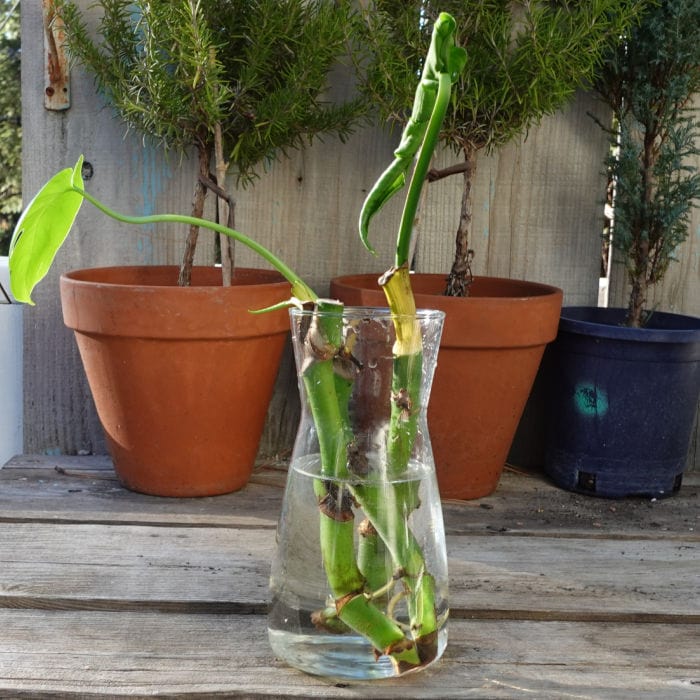
Rooting in Water:
- Place the prepared stem in a glass of water, ensuring that the leafless portion is submerged.
- Keep the glass in a warm, brightly lit area, out of direct sunlight.
- Change the water every few days to keep it fresh.
- Roots should begin to form in about 2 weeks. Once they are an inch long, you can plant the cutting in individual pots of soil.
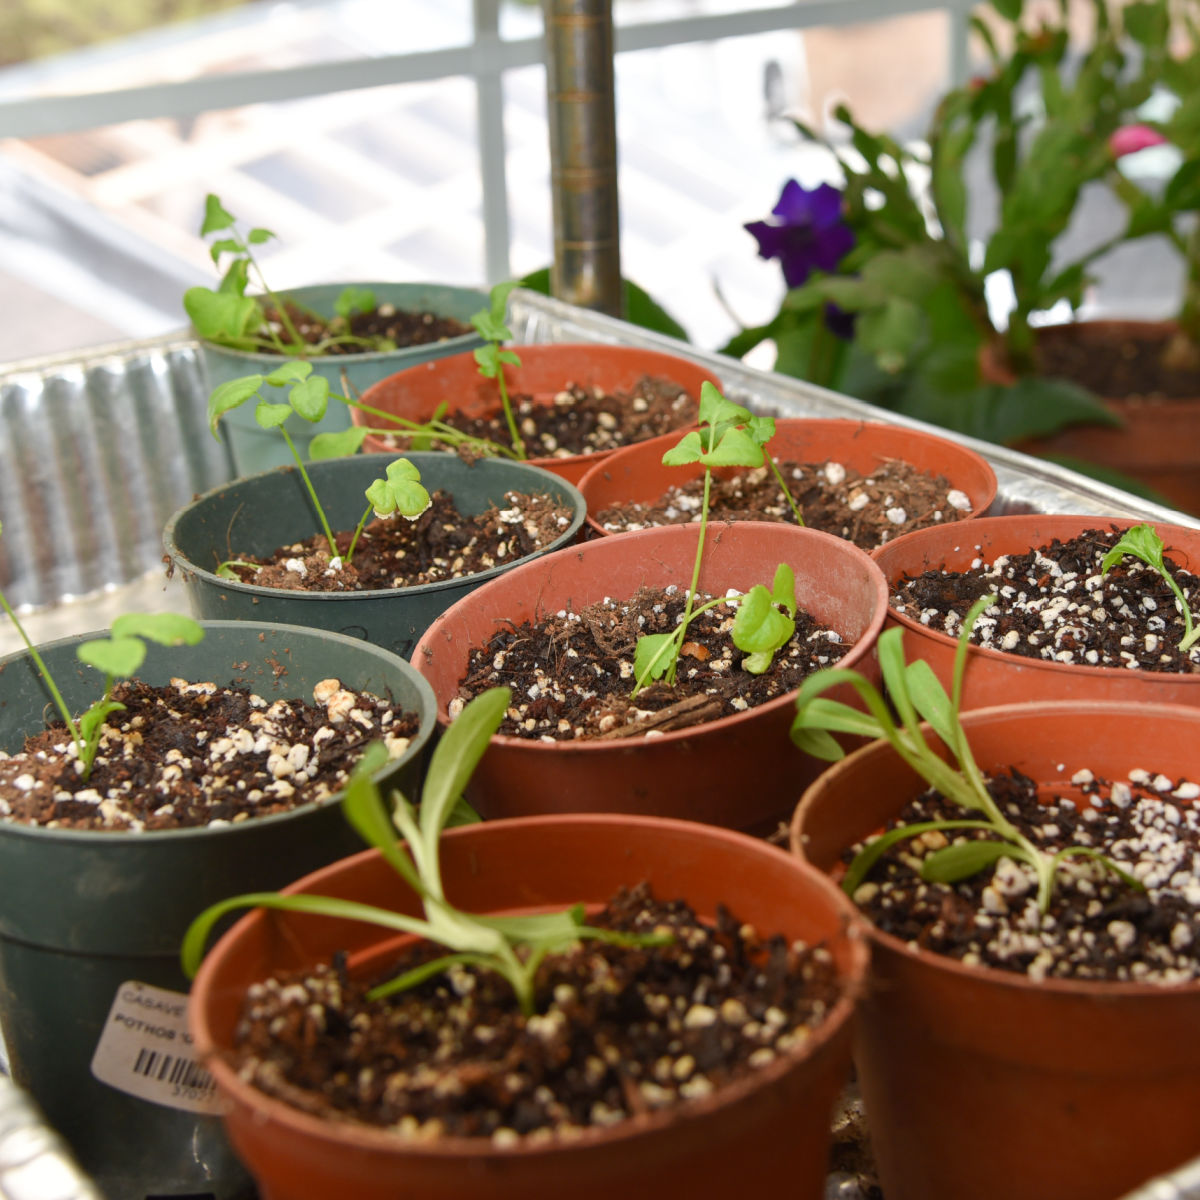
Rooting in Soil:
- Alternatively, you can plant the healthy stem directly into small pots (with drainage holes) of moist potting soil.
- Make a hole in the soil with your finger, a dibbler or pencil, insert the stem, and gently firm the soil around it.
- Keep the soil moist but not waterlogged, and place the pot in a warm, brightly lit area out of direct sunlight. Cover the pot with a humidity dome, easy enough to create with a plastic bag. (or use the covers I like over on the geranium post)
- Some place them on a heat mat but I have found this unnecessary.
- Regular watering as needed makes sure they do not dry out.
- The stem will root in a few weeks, at which point it will start to show new growth.
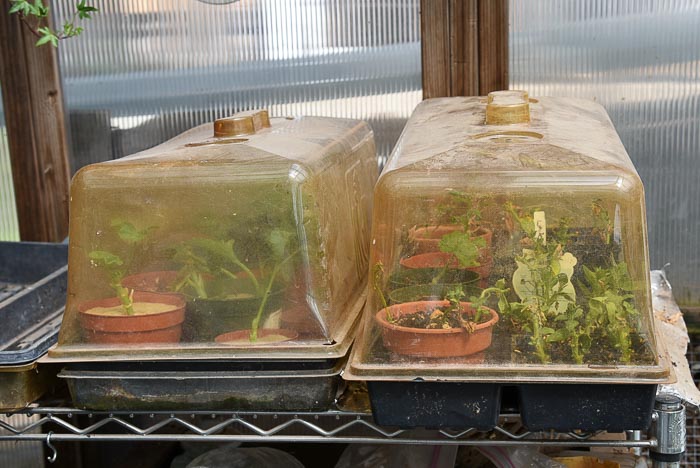
I use these domes for cuttings that need the headroom, for seeds, I use a shorter dome or cover. Remove once you notice root formation. (if it is done in smaller pots or containers you will notice root emerging from the drainage holes)
Propagating Coleus from Seeds
What You’ll Need
- Coleus seeds
- Seed starting mix or potting soil
- A pot or seed tray
- Plastic wrap or a plastic dome
Step-by-Step Process
Prepare the Seeds:
Start by filling your pot or seed tray with moist seed starting mix or potting soil. Coleus seeds are tiny, so there’s no need to bury them deep in the soil. I like to start mine in early Spring.
Sow the Seeds: Sprinkle the seeds lightly over the surface of the soil. You can gently press them into the soil with your finger, but don’t cover them, as they need light to germinate.
Maintain Moisture: Cover the pot or tray with plastic wrap or a plastic dome to keep the soil moist. Place the pot in a warm, brightly lit area but out of direct sunlight.
Watch Them Grow: Keep an eye on your seeds, and make sure the soil doesn’t dry out. In about 2-3 weeks, you should see tiny seedlings starting to emerge. Once they do, remove the plastic cover and continue to keep the soil moist.
Transplanting: When the seedlings are a few inches tall and have developed a couple of sets of true leaves, they can be transplanted into their larger pots or into your garden.
Watch for slugs and snails, they like nothing better than to eat your healthy coleus plant to a nub!
Growing Tips for Success
- Light: Coleus plants thrive in bright, indirect light. Too much direct sunlight can fade their vibrant colors. (unless it is one bred for direct sun)
- Water: Whether you’re rooting cuttings in water or soil, or growing from seeds, keeping the medium consistently moist is key to successful propagation.
- Patience: Propagation is a waiting game. Give your plants time to grow roots or germinate, and you’ll be rewarded with a beautiful new coleus plant. However, you won’t need to wait long to enjoy a mature plant.
By following these simple steps, you can easily propagate coleus plants and add a splash of color to your home or garden.
If you wish, you can overwinter them indoors by turning them into houseplants. (bring them in before you first frost)
Learn more about the different types of cuttings you can propagate.
Happy gardening!
Hi, I’m Pamela
With 45 years of hands-on gardening experience, I love sharing practical tips, proven techniques, and inspiration drawn from my own gardens. My goal is to nurture your confidence, spark your passion, and help make every step of your gardening journey more enjoyable.