Propagate Clematis by Layering

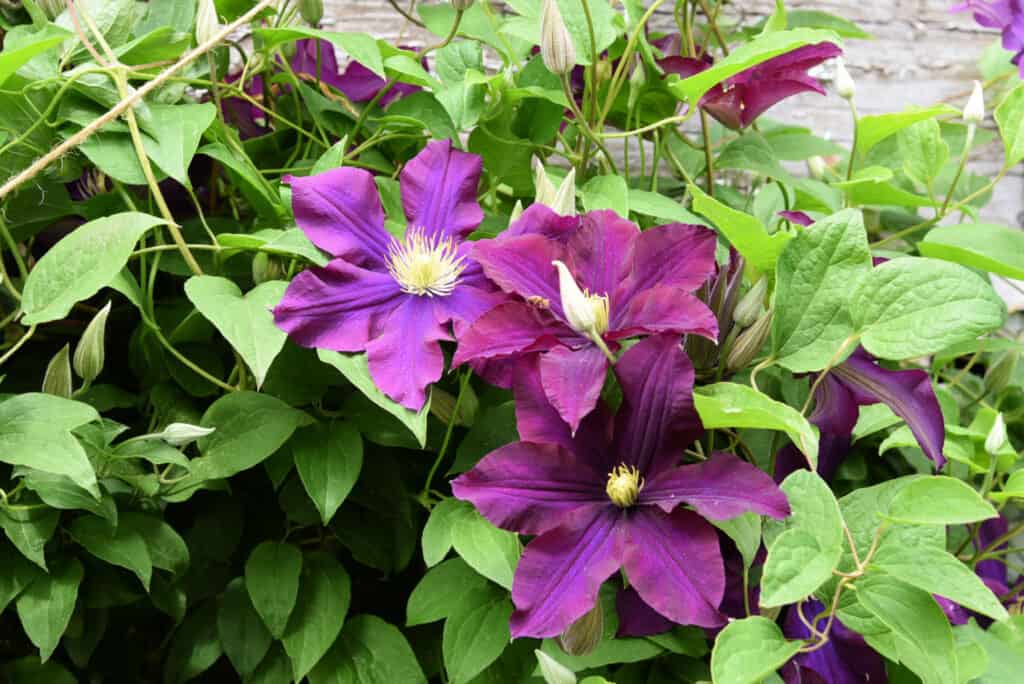
A very popular vine grown in cottage gardens is clematis. There is such a wide variety of clematis you can grow and enjoy. Did you know you can easily propagate clematis by layering? Read on and you can learn step by step!
In a previous post, you learned how to Propagate Roses by Air Layering and it now has become a favorite way of rooting roses. To propagate clematis by layering you use the same principle but it is done a little differently.
What you need to propagate clematis by layering:
Mother plant
sharp knife
rooting hormone
Toothpick (I used a pine needle)
Garden pin or small stone
optional: potting soil & 3 to 4-inch plastic pots
Start with your clematis vine. This is the one that was renovated this past Fall and shared. The renovation worked well and now I can use some of the fresh Spring growth at the base of my clematis vine to propagate more. You can actually root many new clematises along one vine.
This post contains affiliate links. If you make a purchase after clicking a link I may make a small commission at no cost to you.
The video at the end of this post shows best what I am working with. The photo shots basically show the new spring growth.
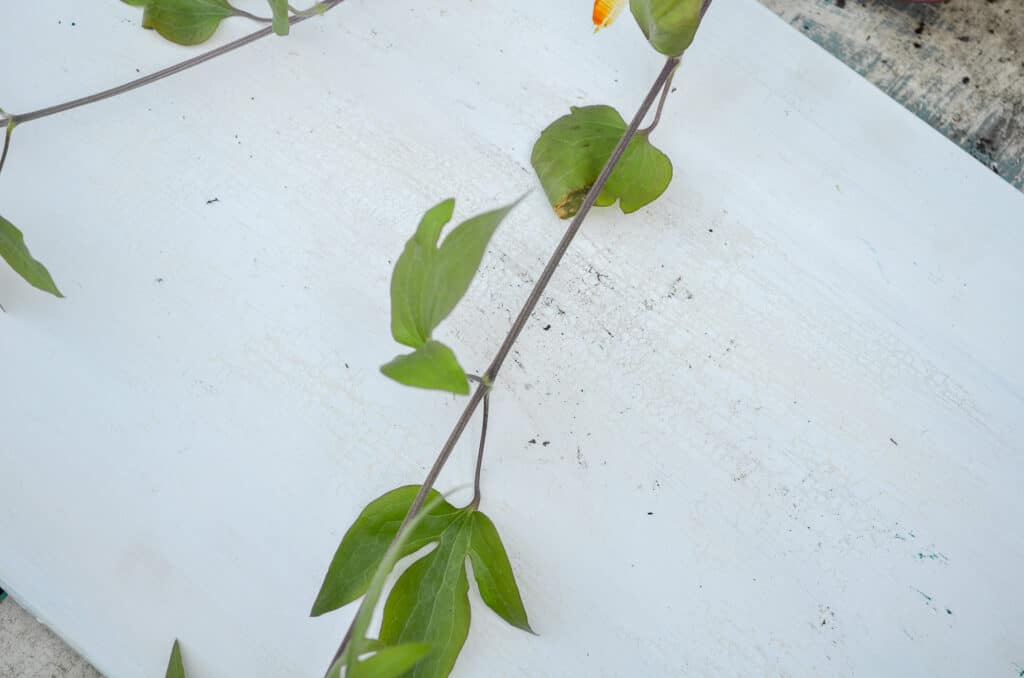
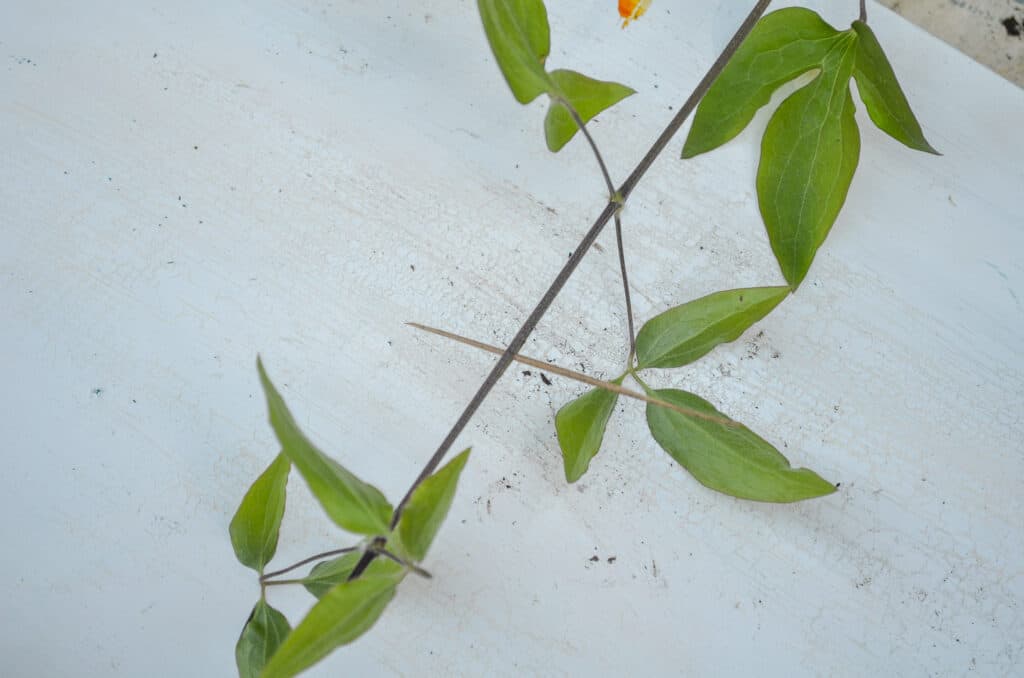
Clematis are ‘internodal’ rooters, meaning they root in between leaf nodes. Many other plants actually root at the leaf node.
Prep for layering the clematis
To propagate clematis by layering bury 4 inch plastic pots at the base of the clematis. You can also just use the ground. The vine you are working with should be long enough to lie over the nearby soil. Place the pots at the sections of vine you will be propagating. Or lay the vine along the soil surface where you will keep it until it roots.
Place a board or other solid surface under the vine for ease of the next steps. It is optional but it does help.
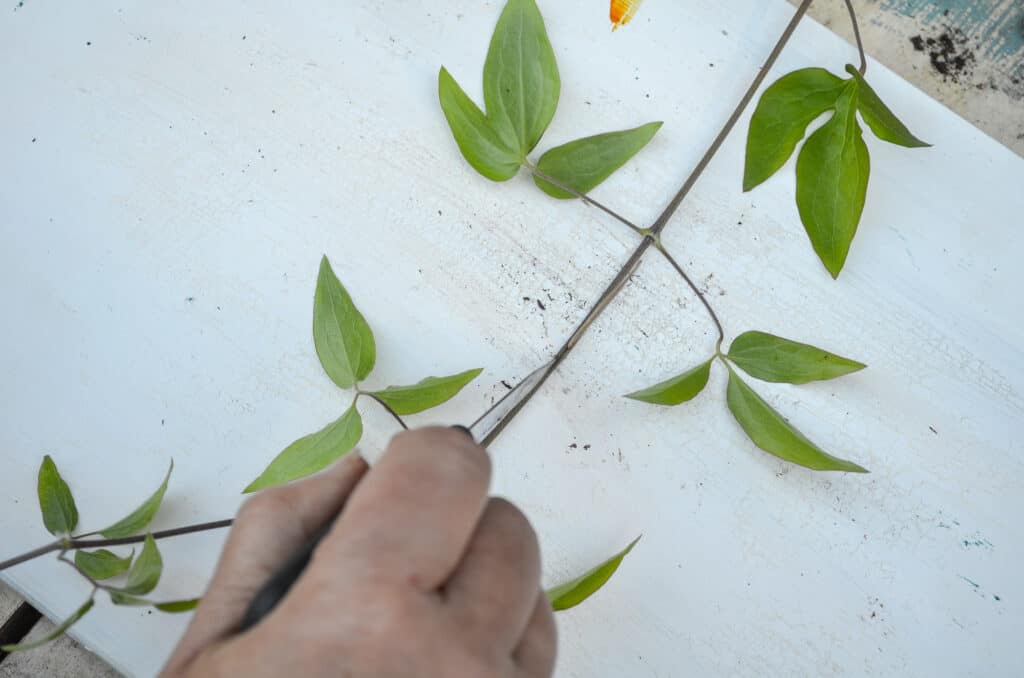
Slice the clematis vine
Use a sharp knife to slice into the stem between two leaf nodes. The slice is about an inch long.
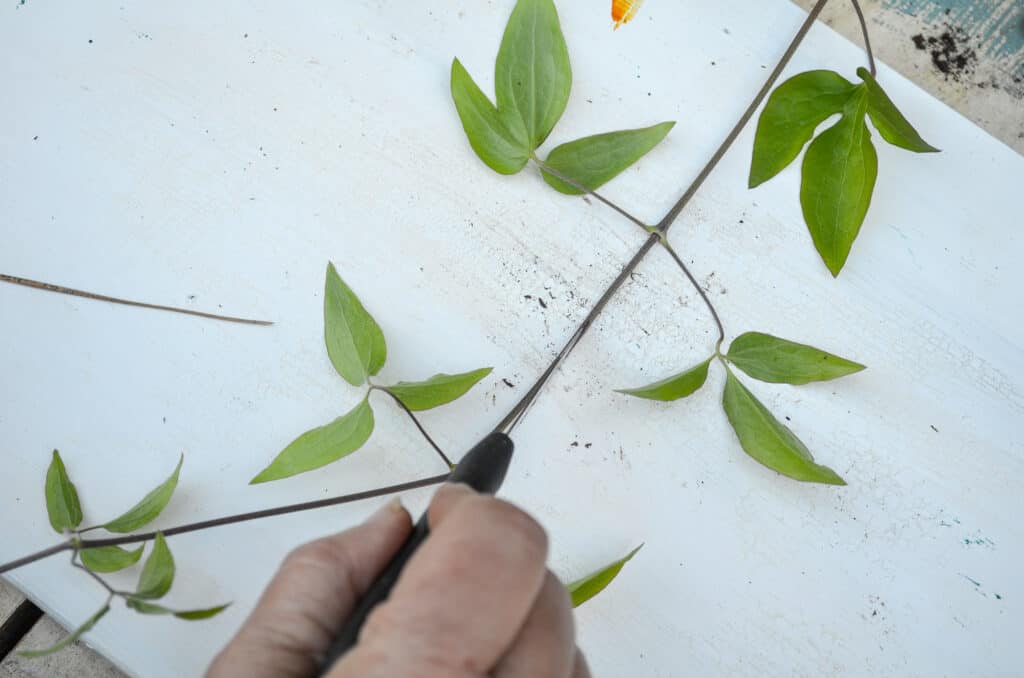
Once you have created a slice hold knife in the slice to keep your place slide a toothpick (I actually use a pine needle this time) into the slice to keep the stem sides apart slightly.
The theory is it prevents the stem from healing over before it has a chance to root.
Paint the sliced stem with rooting hormone with a small paint brush.
Bury the slice of clematis vine to root
The pots are already placed into the soil around the base of the mother plants and have some moist potting soil in them. Or your soil has been loosened and ready to plant into.
Gently press the sliced part of the stem into the soil (careful clematis can snap so easily) and cover with more potting soil or soil.
This part is actually much easier on the ground than in a pot unless you have buried your pot. I like using pots as I find it a bit easier to dig them back up. In the ground, I am not sure how deep the roots go. But in the long run clematis can be tough.
I have dug up certain clematis in my garden to move and a tiny piece must have been left in place as the next season a clematis comes up in the same location. And the portion I dug that was planted in another spot in the garden grows as well.
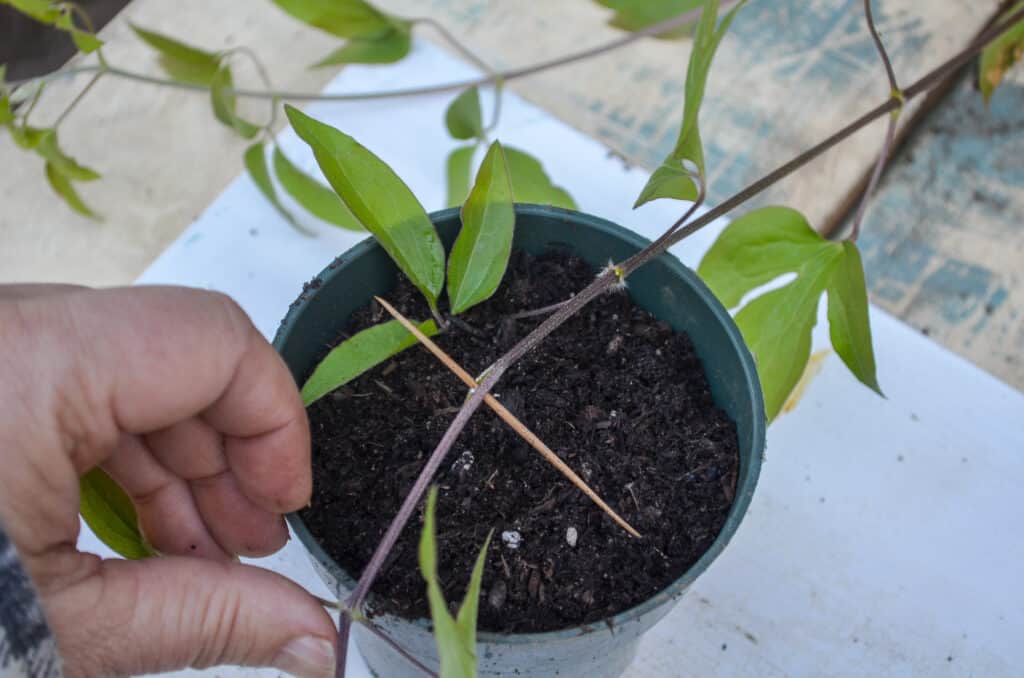
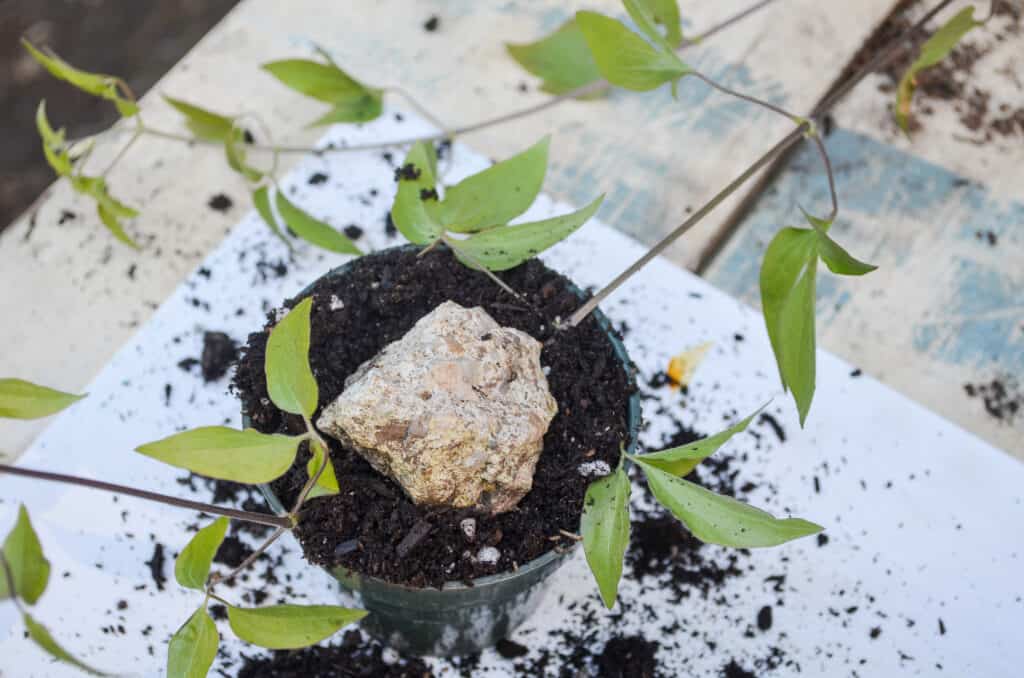
You can use garden pins to hold the vine down under the soil or use a stone that is hefty enough to do the job.
One of the pots below has the stone and the other is waiting for its stone.
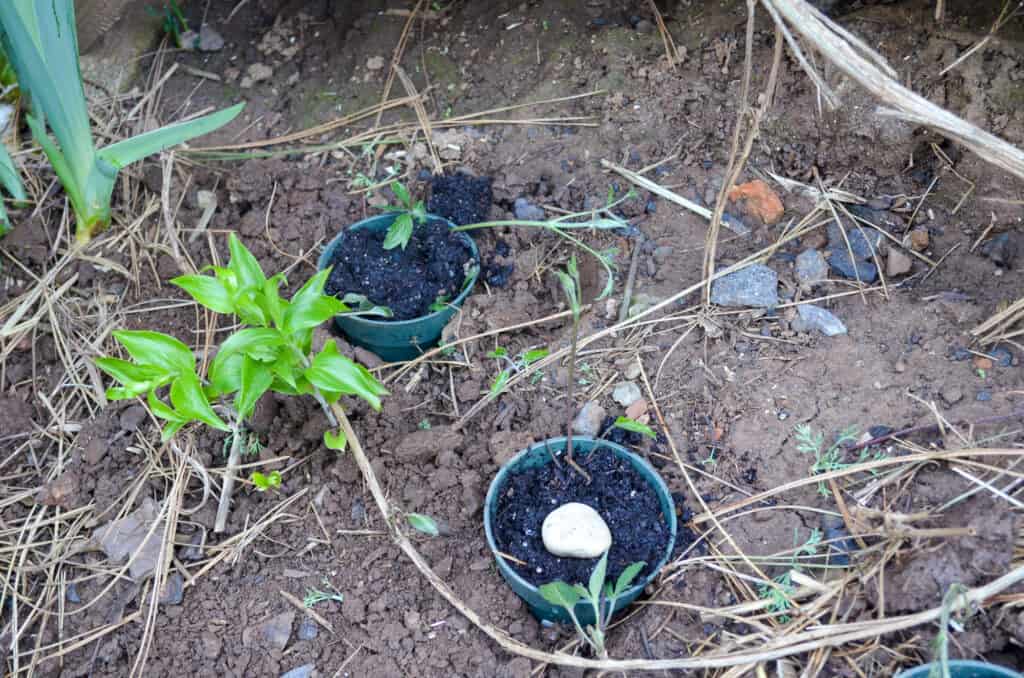
This next one gets a clump of cement. Use what you have.
Wait
Now here is the tricky part, waiting and making sure the little pots don’t dry out. (it can take all summer for them to root, some varieties root faster than others) Being buried slightly in the ground helps them to retain moisture and adding mulch over them somewhat until the annuals I plant at the base of my clematis (mother plant) get large enough to shade little pots.
How do you know when your starts have rooted? You will see vigorous growth shooting up. Good strong growth. At that point, you can double-check that there are roots by gently digging out the soil around the stem area you layered and checking to see.
Here is the video I did of this post hoping it would help you to see what I did in better detail.

Relocate when Rooted
Pull the little pots with the rooted clematis out of the ground, if you check and they have a nice root then sever them from the mother plant. and you can now pot them up into larger containers or plant them in their new permanent home.
That sweet friend is how you propagate clematis by layering.
If you want to see how it turned out I did an update video on it.
Happy Gardening!
More you will enjoy!
How to Grow Clematis
Spring Pruning Your Clematis
Prune Your Clematis for Top to Bottom Bloom (how to renovate)
How to Root Clematis from Cuttings


That’s been really helpful – thank you!
This is great! Thanks! This is very helpful.
Thank you, Pamela, for the instructions. You solved the mystery of why my tries have been unsuccessful… BETWEEN the leaf nodes. I’m going to try this with my CA native one when spring starts.
By rooting hormone, would vitamin B-1 work, what I usually use for growing roots on baby plants?
I have not tried to start Clematis from seed so I don’t know if it will bloom faster than those. Each type clematis can start blooming in its own good time and conditions can play a part. Mine bloom well by the second year, though sparsely then by the third year it is a blooming fool!
How long should it take the newly propagated plant to form blooms? I know that nre clematis plants can’t take a few years – will these bloom sooner than a ant started from seed?
Hi Janet. In the first paragraph under “what you need to propagate” is this sentence: “The renovation worked well and now I can use some of the fresh Spring growth at the base of my clematis vine to propagate more.”
I hope this helps.
You mentioned the brittleness of the stem. Is the place where you pierce the stem old, woody growth? New, green growth? Somewhere in-between?
I just buy it, I have never tried to make my own. I have used several types and as far as I can tell they all worked well.
Hi Pamela, Do you make your on rooting hormone or do you buy it. If you do make it your self could you share your rooting hormone solution?
thanks for the response Pam. Pelre d’Azur is beautiful and a prolific bloomer and late flowering so perfect with my Z5b roses which generally don’t begin blooming until the end of June. She is a nice darker lilac color and has been fuss free for me. Only on her second year and she is loaded with buds!
Have a lovely weekend.
Sharon
I know what you mean about the very tight budget. That is really why I was motivated to learn all these tricks in gardening when I was starting my first garden I had no budget for buying plants etc and relied on cuttings, starts and seeds from fellow gardeners who delighted in sharing with me from their gardens.
Thank you so much for sharing this knowledge with us newbies! I am on a very tight budget presently, and would love to gain additional vines. Thanks again, your videos really help.
Yes, this will work on any type of clematis, in fact the one I demonstrated is considered a Type 3. Distance from the end of the vine is not relevant. You can actually do several on the same vine at different intervals which is called Serpentine layering. I like the name of your clematis, I need to look that up, it sounds lovely.
Great video Pam. Thank you so much for taking the time to share this technique.
A couple questions-
Will this work with any type of Clem? I have Perle d’Azur which is a type 3 Clem.
Also how far from the end of the vine do you slice? Several leaf nodes or a couple?
Thanks for any additional info.