She Shed Makeover the Reveal
I joined a group of ladies that were transforming one room for under $100. I chose my Studio cottage aka She Shed and here is how it turned out.
This is the reveal of my efforts in the $100 Room Challenge hosted by Erin at Lemons, Lavender and Laundry.
As you may or may not know I came down with that flu my husband had (yes, he shares everything with me) so the past two weeks have been a total loss.
But I did make headway the past couple of days and I can say I am well pleased with the results.
Did you see the before?
Yes, I confess it had gotten out of control! That is why I joined the challenge because I needed to be accountable. It was so overwhelming at times that if I hadn’t committed myself to the group I would’ve tossed in the towel many times.
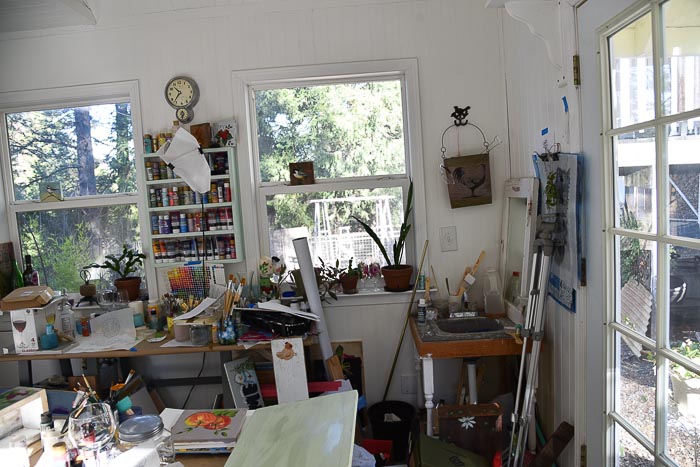
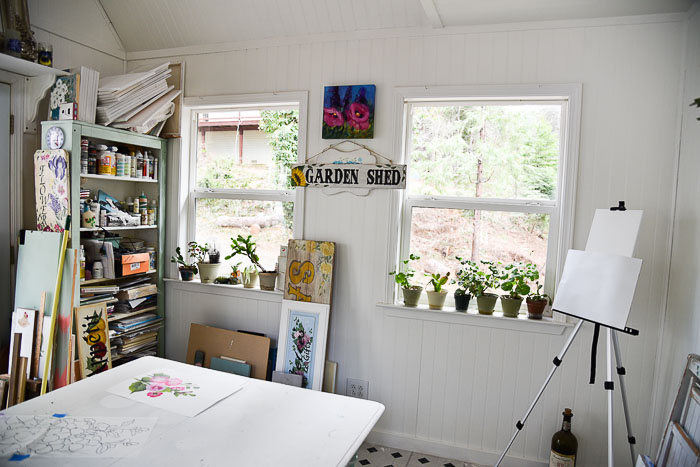
As my routine I will start at the sink area. I got my little cubby shelf installed and the paper towel dispenser set on top.
This post contains affiliate links. If you make a purchase after clicking a link I may make a small commission at no cost to you.
The curtain under the sink hides cleaning supplies and other necessary stuff.

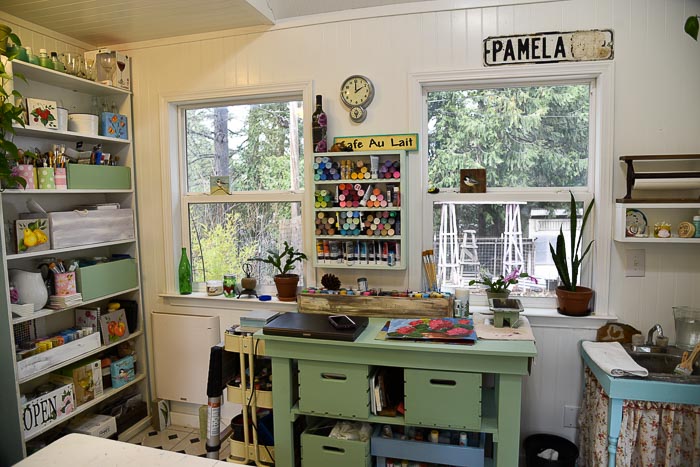
Next up I moved out the desk and put the DIY work bench here. I built this the same way I built my very large workbench but used all 2 x 4’s instead of 4 x 4’s.
I painted it using the same green paint that was off the reject sale shelf at the hardware store. I had it on hand so no $$$ spent on that.
The paint shelf above the workbench was built was another DIY I did in the past. I just organized it better to neaten it up.
I also painted up some wood crates in the same green keeping it more uniform and less busy. These hold various supplies.
The bookcase got more DIY crates made and painted to keep things in order and I moved it forward just enough to tuck my palette paper behind.
The shelf cubby is basically one of those DIY crates with the bottom screwed into the studs of the wall above the sink.
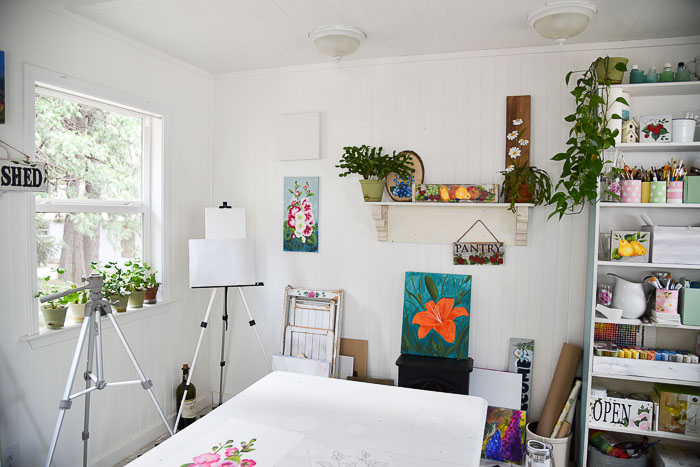
The far wall is where I had the work bench but now I am leaving it without any furniture. My easel fits into the corner well and I like having more room to work without feeling crowded.
I also need access to the windows on this side as I have to put up sheers during certain hours of the day to diffuse the sunlight coming in.
If I don’t it creates harsh lighting that is impossible to make a decent painting lesson video in.
The table in the center of the room is easy to move about when I need to and having more space means I can relocate it easier.
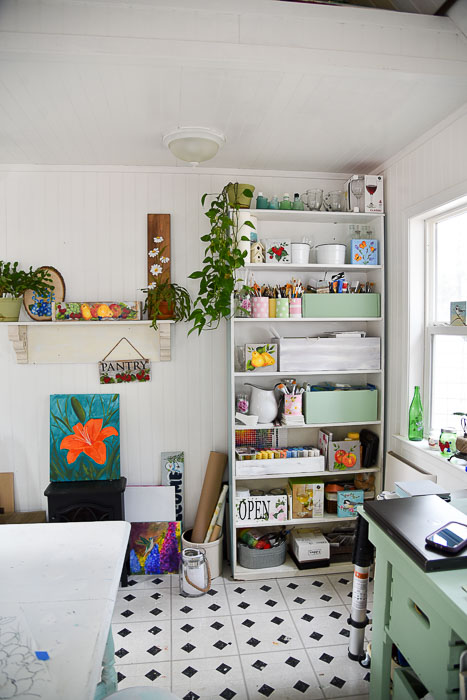
The bookcase on this side is where I was not able to finish as I would’ve preferred. I want to restack the canvas’ that rest on top and I will be putting up a clear shoe hanger for my tubes of professional artist paints.
Having them organized by color in a shoe hanger will make them easier to use. It won’t be super pretty but it will be very useful and that is what I need in my working studio.
If you haven’t watched it go back and see the video. I explain what I have in mind for the future. And since I only spent about $11 for the rods that hold up the curtain on the sink then I have $89 to put towards new flooring!
Now to keep it from becoming a nightmarish mess again!
If you want to catch up here are the weeks I was able to post on.
Week 1 | Week 2 | Week 3 | Week 4 | Week 5
As challenging as this was I may very well do another in the future. It helps me to keep focused and get something on my list done that I procrastinate on!
Until next time….


Looking really good Pam a great place for you to be creative.
Nice!
I wish I had a space like this in my home all to myself. This is a great makeover!
Your shed looks like my craft room did before I did the challenge for the first time! But I love what you did with the space. It’s perfect for being creative!!! Hopefully you will be feeling much better soon.
Beautiful! Everything in it’s place.
Awesome job! As an artist, I know that creativity is messy. You are so lucky to have your own she shed! Especially one as cute as this one.
Your created a lovely and peaceful place to work in. I envy your space. Everything looks so organized. Happy creating in your space Pamela!
I had to laugh when you said you joined the challenge to be held accountable. This is so true for me as well. I love your she shed soooo much. Even when it was in disarray. It does look even better now. Great idea to use that pretty green paint on all of your crates. It pulls everything together. One day I hope to have a dedicated office/studio of my own.
Well now I need a she shed ASAP! I love how it turned out!