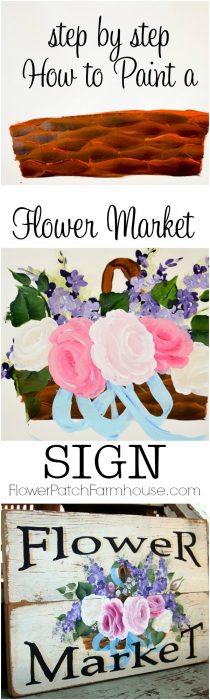
How to Paint a Flower Market sign
How to Paint a Flower Market sign

I know many have been waiting for this tutorial and I have finally gotten to it. The video ended up on the cutting room floor, in its entirety. I will attempt to redo it in the future and provide the link but for now you get the step by step alone. Sorry.
I painted this sign on two 1 x 6 boards cut 19 inches in width. To see how I cleat boards together to make signs just CLICK HERE
(this post contains affiliate links, please see disclosure page for more info)
Supplies:
- Brushes
#10 Bright or you can find them here as well..Dick Blick Art Supplies - #4 Filbert or Flat
Scruffy Brush or bit of sea sponge
Liner Brush - Plaid Folk Art Multi Surface or Classic Acrylic Paint
Licorice
Fresh Foliage
Thicket
Violet Pansy
Lavender
Magenta
Baby Pink
Wicker White
Parchment
Burnt Umber
Cinnamon
Deep Ocean Blue
Floating Medium - Tracing Paper
- Transfer Paper black and White
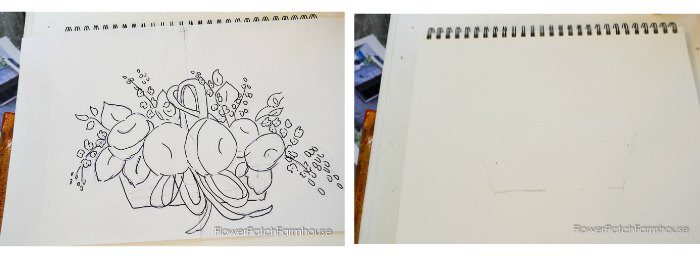
I begin by copying my pattern on the tracing paper, which is transparent, this helps me to line up my design in phases as I go through the painting.
I start with the tracing paper pattern, transfer the basket area, or parts of it to get a guideline. It is not easy to see but you can make out the faint lines on my paper of where the basket will be.
(later I figured I should’ve transfered much of the pattern and only gone back over the areas that needed it when the time came)
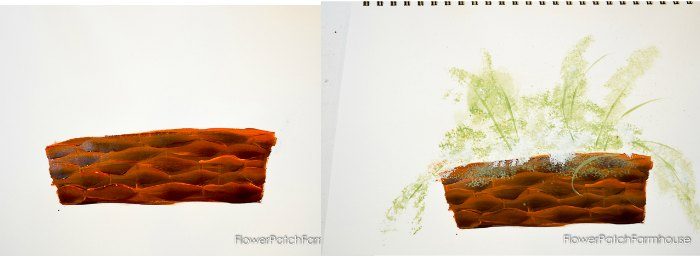
Paint in the basket using a Burnt Umber for the background then follow the same instructions as I gave in this post…Paint a Basket of Pansies and here is a direct link to that video which shows me painting the basket, Paint a Basket of Pansies video.
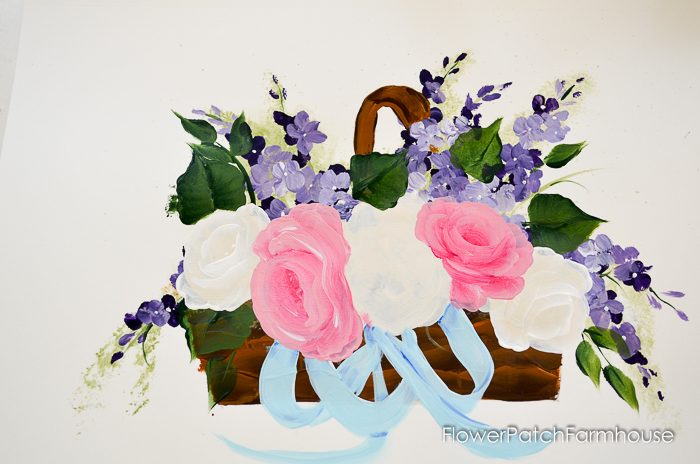
Mix floating medium and Foliage Green until you have a transparent color, lightly tap in some foliage and stems with a scruffy brush. This sets in the background and we want it to be airy not solid. With the chisel edge of your flat brush pull in some stems.
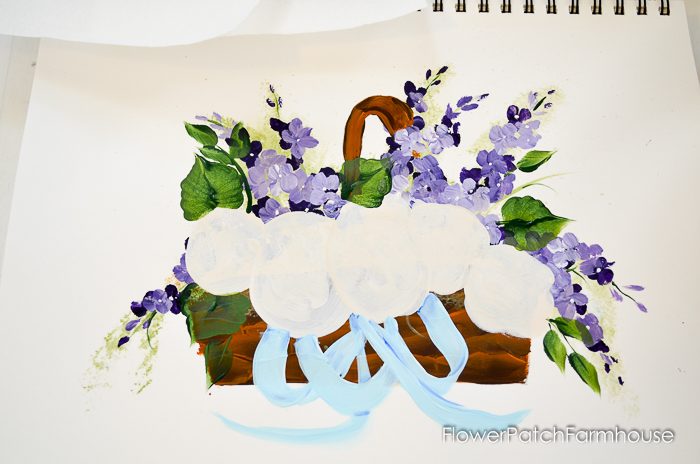
After the foliage is dry I lay my pattern back over the piece and transfer the lines for my handle and purple flowers. I put in the darker purple flowers first and lighter ones to the front using my filbert brush.
Here is my video of the five petal flowers, it is one of my very first videos so you get to see my humble beginnings. Easy 5 petal Flowers
I should’ve put my handle in first but I did not but you can, and should. Notice I start the tops of my purple flower spikes with just little taps of color for a bud and not a full flower.

I add my ribbon using Medium Blue mixed with Wicker White… and for a more detailed explanation see How to Paint Ribbons
Paint in the leaves with Thicket and Foliage Green using the #10 flat brush.
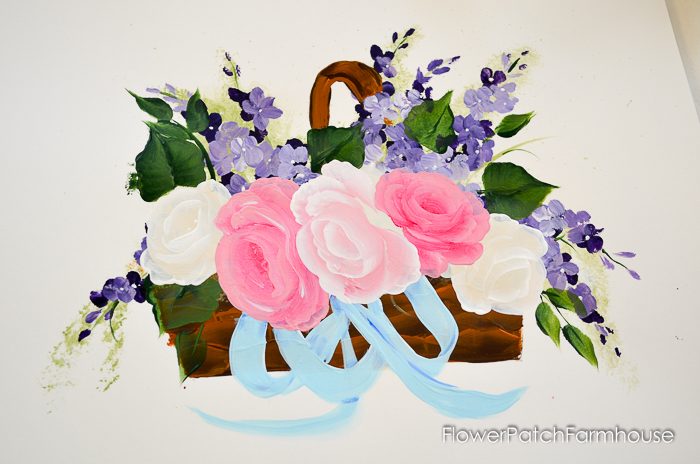
I white out the areas where my roses are going to be placed. I just paint on a coat of white paint and let it dry. This blocks the darker color from showing from underneath through my roses.
 I start with the roses that are to the back, in this instance that is the white ones. Go to my post on How to Paint Roses for a detailed step by step.
The white roses are a painted with Parchment and Wicker White…
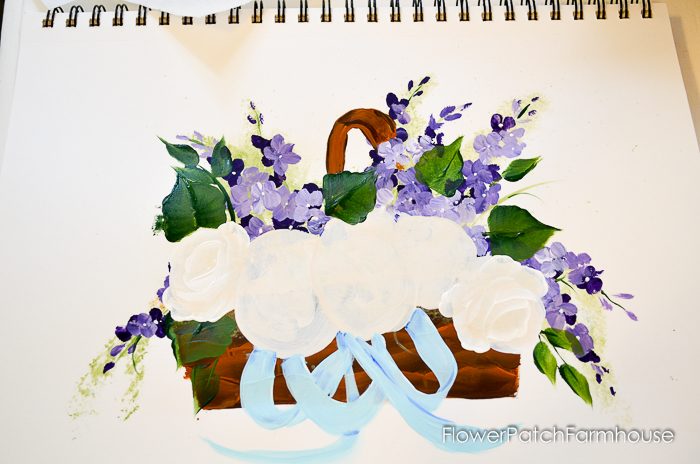
Next paint the two darker pink roses using Magenta and Baby Pink, a touch of Wicker White for highlighting certain strokes.
Last but not least the light pink rose, that sits front and center, which is painted with Wicker White and Baby Pink.
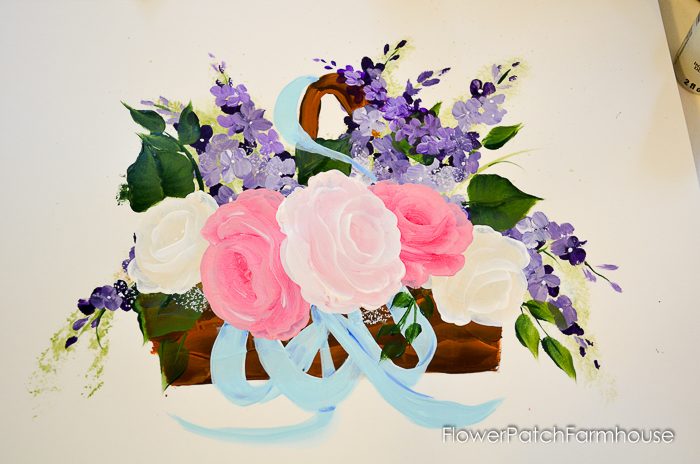
Drats! I painted it facing the wrong way, let it dry….white it out with a coat of wicker white and let dry again.
Now repaint it facing the correct direction..fixing mistakes is just part of the painting fun.
 Add the lettering to the top and bottom of your sign in Licorice and voila’ you have your Flower Market Sign!
For how I paint lettering, see this post here LETTERING
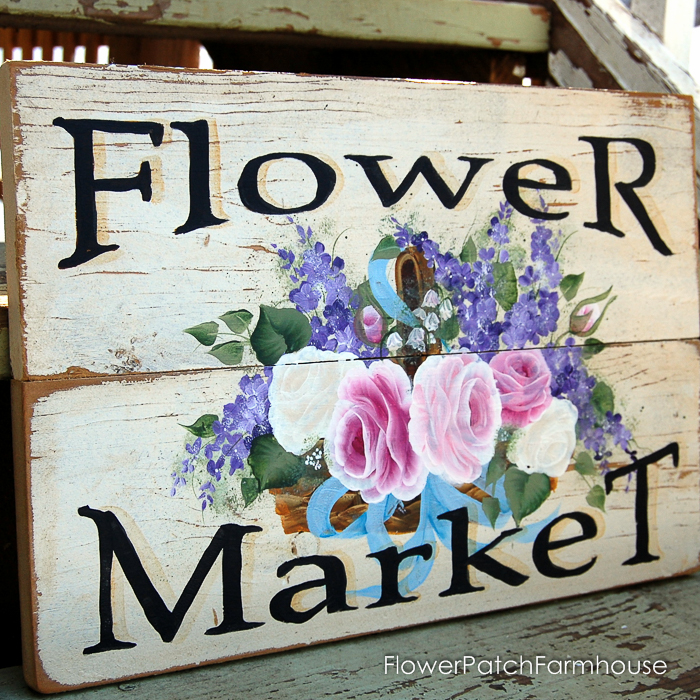
Click on over to this post to see how I get the distressed look on my wood How to Get a Rustic Finish in 4 steps.
Click here to purchase the pattern packet!
Happy Painting!
If you enjoyed this post please PIN and share

Hi Mary Louise. My maiden name was Scott. 🙂 Anyways, yes I have a couple how to paint roses tutorials on my site. The links are in red when you scroll down through the blog post, but here is the link for quick reference to one of them. http://www.flowerpatchfarmhouse.com/paint-a-shabby-rose-in-3-minutes/
At the bottom of the page there are more links for you.
Love the sign and I do want to try to paint one sometime soon. I like your roses…..do you have a video or steps how to paint your style of roses? Thank you.
I have to fix so many of my painting mistakes I am become more of an expert at fixing than actually painting. 🙂
I am so glad you are finding it helpful here. I need to plant more Delphiniums, I killed 2 of my favorite dark blue ones trying to divide them a different way than I normally do. Bad idea! I should’ve went with my usual way.
The sign is so fun to paint too, you can add any wording you like to customize as well.
Hi Pamela, I just love the Flower Market sign, so country chic. It makes a lovely decor piece. thank you for your detailed instructs. I would love to make one. You make it look easy. Also have 4 flats of Delphinium seedlings. Tried different starting methods. Had good success w/ the coffee filter method of germination. Can’t wait to have my own beautiful garden of Delphiniums in Virginia. Your site is so inspiring. Thank you, Cheryl
I probably would have left that pale pink rose facing the wrong way – it looked so pretty. You are really a perfectionist; having the rose facing in the right direction does add to the final beautiful outcome!