How to Paint the Back of a Rose
How to Paint the Back of a Rose, I show you step by step how to capture roses that face away from you in a bouquet or design.
Learn How to Paint the Back of a Rose on stroke at a time. Easy enough for beginners and fun for everyone.
![]()
Supplies for painting the back of a rose
Let’s get started painting the back of a rose.
Supply list:
Brushes:
Royal Majestic Brush Set or this Brush Set
Brush Caddy
Sta Wet Palette
DecoArt Americana (you are welcome to use what colors you like, these are just what I used in the tutorial)
Baby Pink (or Folk Art Baby Pink)
Titanium White
Royal Fuchsia
Evergreen
Celery Green
Surface
I used a bench I did a tutorial Here: Sweet Heart Bench.
Base in Shape
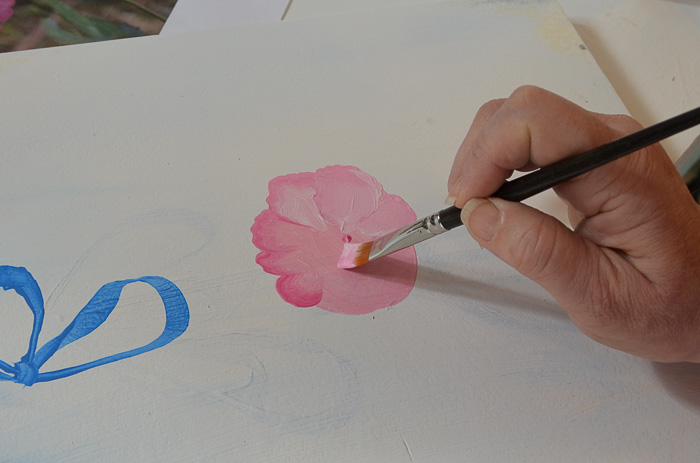
Start with basing in the shape of your rose back in Baby Pink with a #12 Flat Brush. A simple ovalish shape is fine. I have dug out my Masterson’s Stay Wet Palette to use. It keeps the acrylic paints moist and is helpful. I had forgotten how helpful.
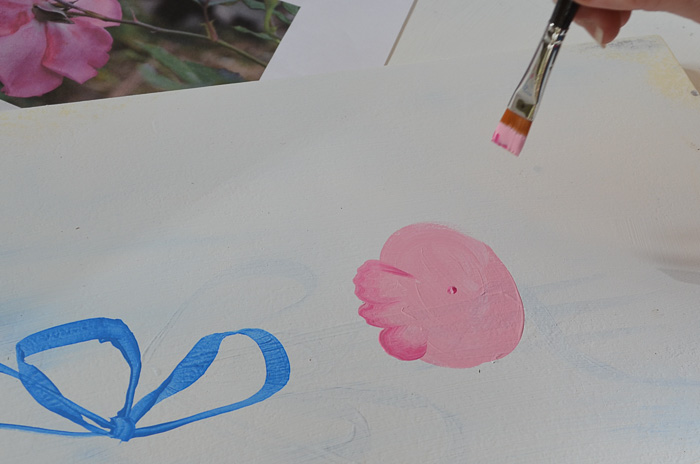
Work from Back to Front
Paint in the back petals of the design using a double load of the Fuchsia and Baby Pink, the Fuchsia on the outside edge. Next paint the side and lower petals overlapping them as you go.
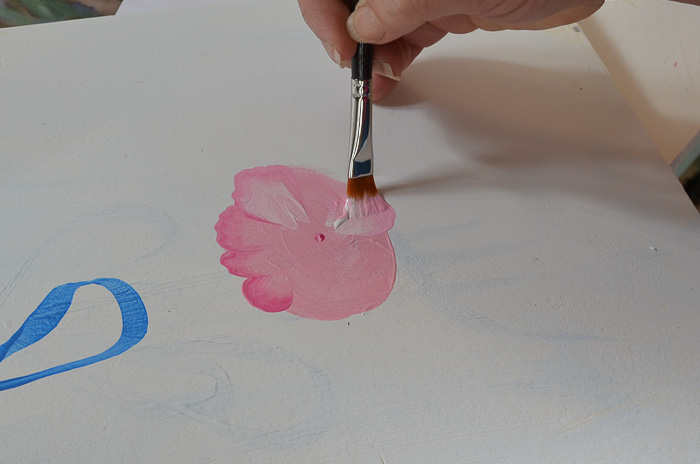
Aiming Point
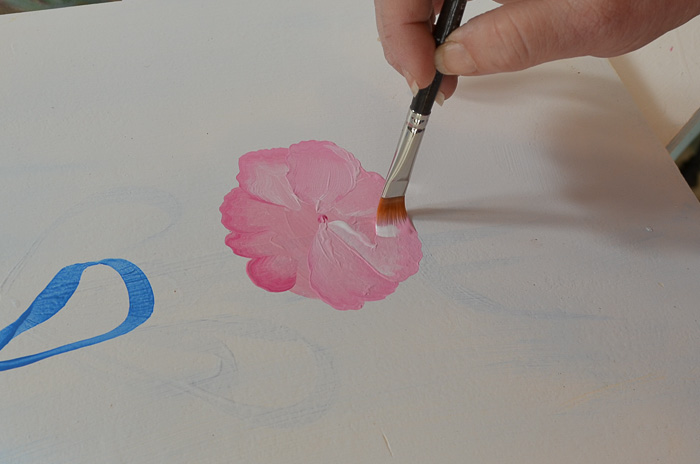
You can see a dot in the center, all your petals should aim for this dot or maybe a better term would be they radiate out from this point. The video at the end of this post is most helpful in letting you see that. I build the petals around, I highlight some with the Titanium white as I progress.
Layering
Keep building or layering the lower and side petals until you have come full circle.
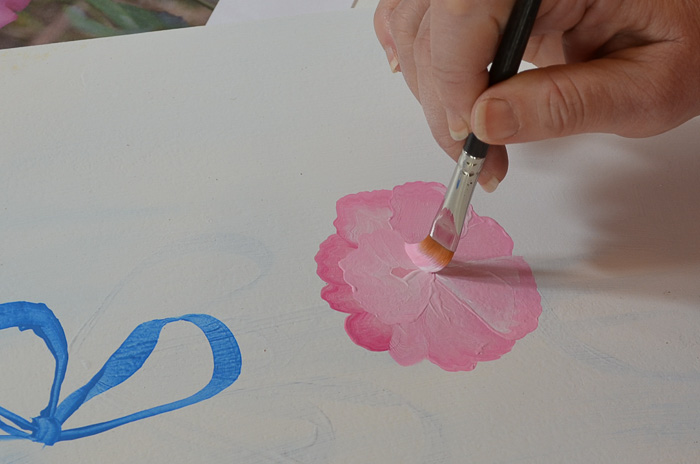
Then with your brush double loaded with the Baby Pink and Titanium white add the upper petal that overlaps the under or back petals. You can add a touch of Fuchsia here and there as you wish to add contrast.
Details
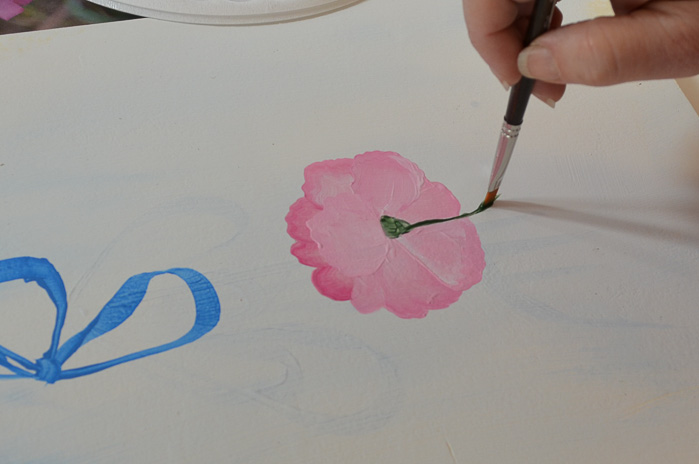
Load a #6 flat brush with the Evergreen and paint on an upside down triangle shape where the dot was in the center. This is your stamen.
Then double load the Evergreen and Celery (in video I say Wasabi but it is Celery) and paint the stem
Next add the stamen leaves and any other leaves you may want on your design
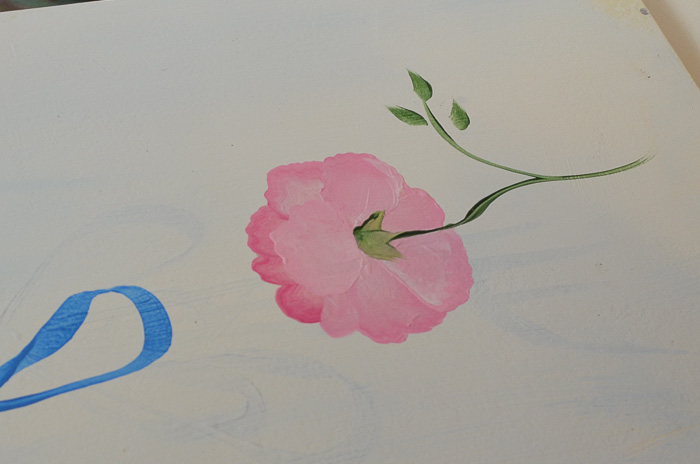
And there you have your back of a rose.
Add this with the rose painting tutorials you have under your belt!
How to Paint Yellow Roses and Paint Pretty Pink Roses
Want to view the video on YouTube: Paint the Back of a Rose
Happy Painting!