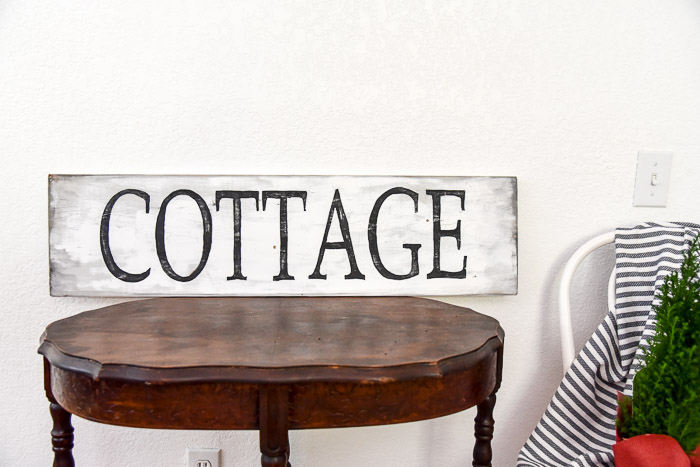
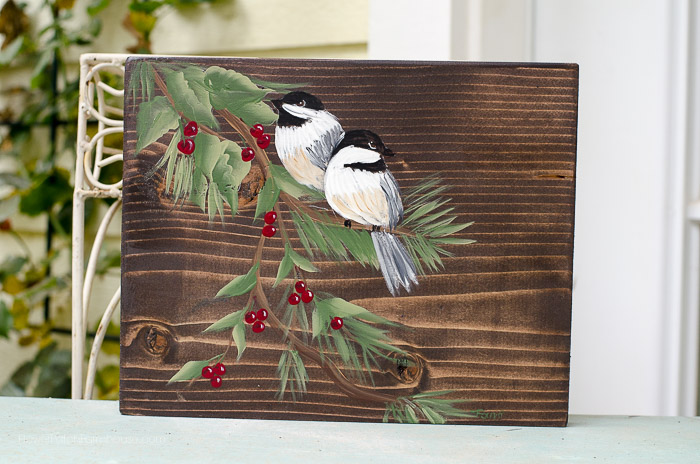
DIY Hand Painted COTTAGE Sign
Simple and fun DIY hand painted COTTAGE sign you can easily paint yourself. No fancy cutting machine or stencils required.
I started my first website/blog to sell my hand painted signs over 15 years ago, it was pretty basic but it was a great way at the time to sell my work. Creating custom pieces for people and bringing them joy with my art was so satisfying.
I stopped selling my signs a couple years ago, things just got too busy with the blog and my tutorials. Now I actually miss painting vintage style signs for folks but I love sharing how people can paint them on their own.
This COTTAGE sign is the latest favorite, I spotted one on The Rustic Pallet instagram feed and knew I had to have one of my own. We seem to have the same taste, I have a Bakery sign pattern all ready to go except it is vertical not horizontal. I like how hers in the kitchen is black with white lettering. I was going to do white with black lettering but now I am rethinking that. Visit her feed, I know you will enjoy it.
I know you will enjoy creating one of these DIY hand painted cottage signs for yourself. Let’s get to it!

There is another tutorial on how I paint lettering that you can refer to as well as this one. A Harvest Sign and How to Paint Lettering.
Get Started
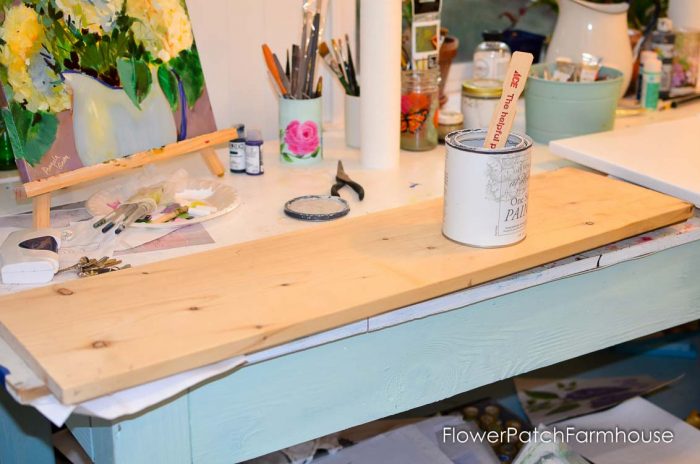
Start with a fresh pine 1 x 10 board cut to a length of 35.5 inches.
Age It
To give it an aged appearance I first paint it with a coat of a sort of greige color. This is just a paint I bought on the clearance rack of my local Ace Hardware. It is a chalk finish paint in an neutral gray/beige that I knew would work well as an undercoat for many things. (ignore my messy paint workbench)
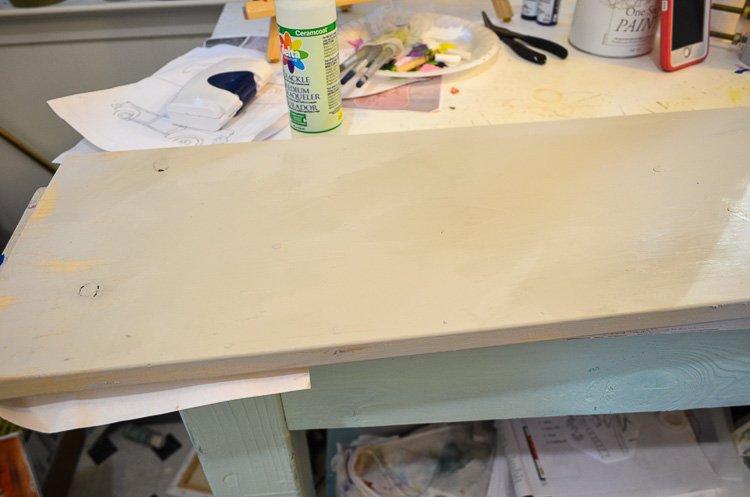
After the paint dries I use a crackle coat. For a full on tutorial on how I use crackle mediums CLICK HERE.
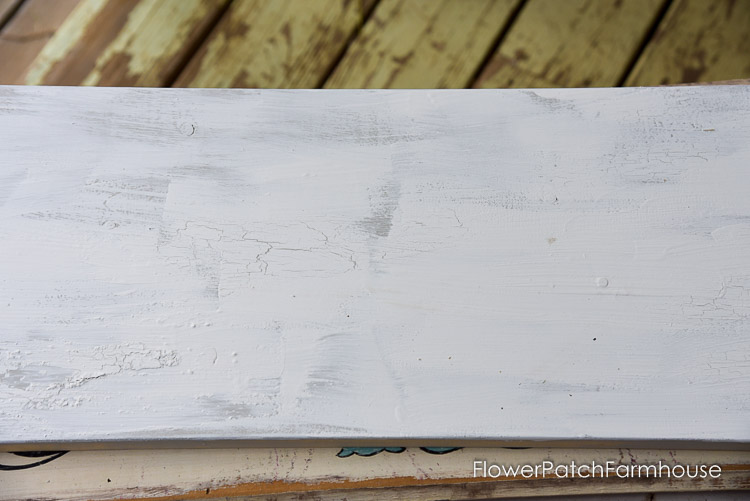
Let the crackle medium dry then paint on your top coat. My top coat on this sign is white, the gray underneath is a great contrast without being too stark.
Top Coat
Be hit and miss with the top coat, leave gaps of the greige showing through. Once the top coat of paint dries sand the goody out of it with a palm or orbital sander. I give the edges a bit of extra sanding, sometimes right down to the bare wood. We will add some staining to distress it later on.
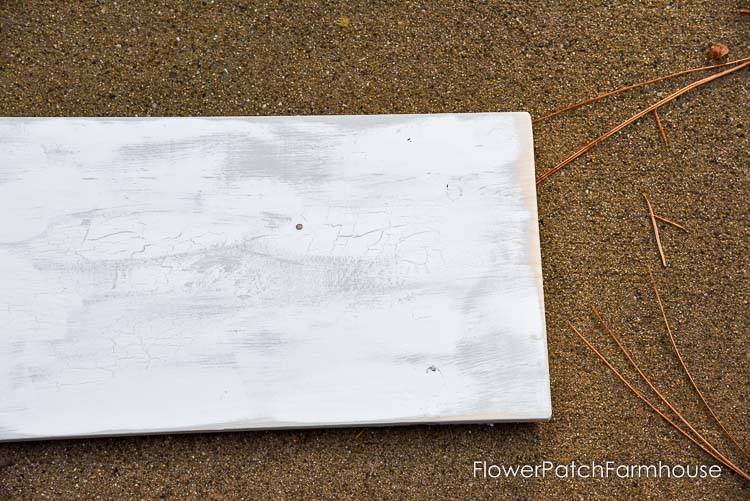
I wipe all the dust off with a soft rag.
Transfer the Pattern
I transfer the letters to the painted board using my graphite paper and Cottage sign pattern. There are many methods of transferring a pattern but using graphite paper is the fastest and easiest, plus it is not expensive in the least. Graphite paper is cheap and reusable and if you make a mistake you can erase it easily if you use the right eraser.
For a complete list of my most used supplies CLICK HERE.
Just place the graphite paper between the pattern and the painted board and with a fine point pen just copy over the lettering using a little pressure.
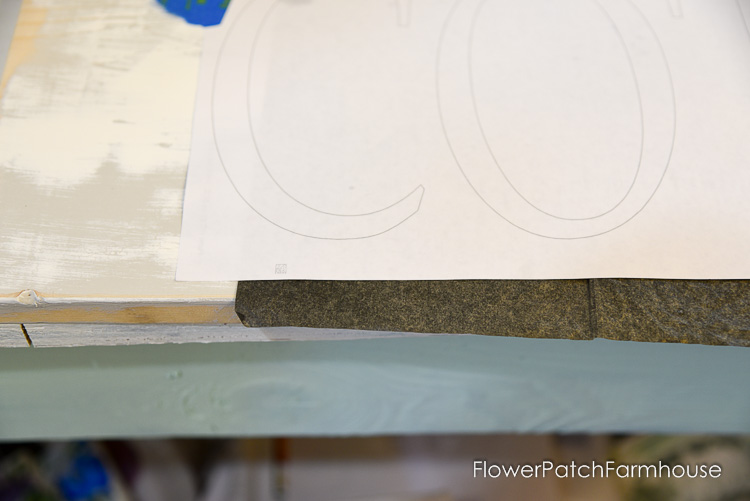
Newer graphite paper will leave your pattern on the surface with the slightest amount of pressure but as the graphite gets used over and over you will need to use more pressure. You don’t need the graphite lines very dark, just enough to see where to paint your lines.
Paint the Lettering
Once you have your lettering transferred it is time to paint them. To get crisper edges I like to use a liner brush and outline them first. You can use paint pens but they smear when I brush on my varathane protective coat, so I like to use the liner brush.
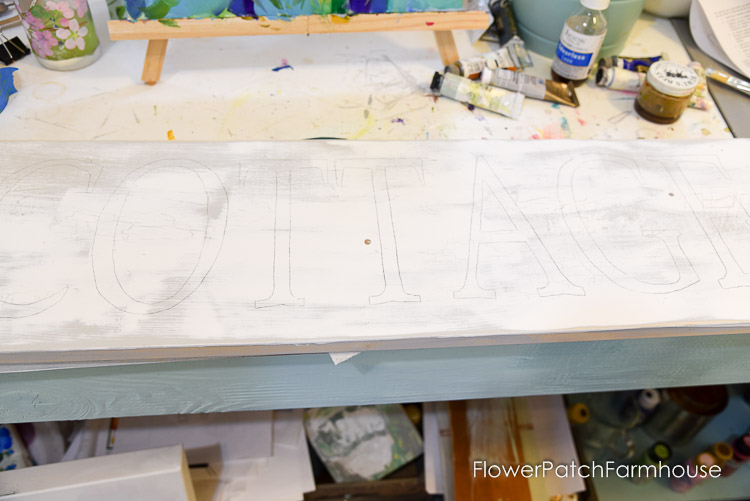
You may prefer to practice using a liner with a bit of inky paint, make long even strokes trying to maintain even pressure. Done practicing? Now start on your sign, when you paint the letters, follow along on the inside of a transfer line. I show you in the video which is linked below.
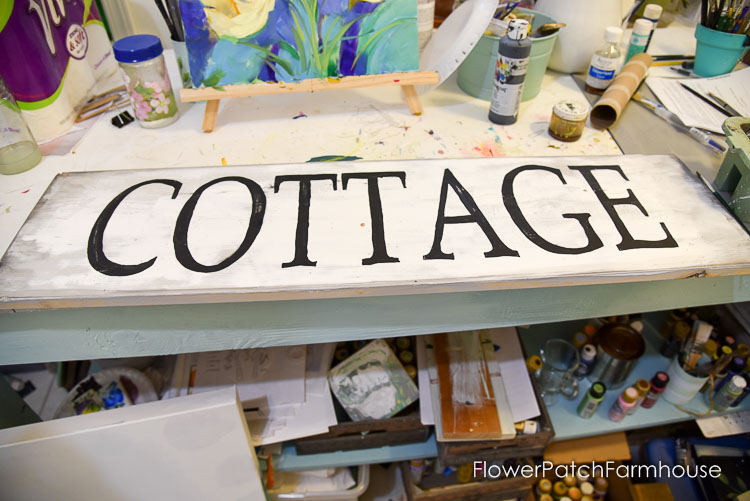
In my video attached I share how I distress the outer edges with a bit of staining. There is also a trick for aging the lettering.
Protect it
Finish off the sign with a coat of Varathane Spar Urethane exterior finish. Since this sign will be indoors I only use two coats but if I was going to hang it outside I would use 4 coats. Sometimes I also like to use wax for the final finish which is also an option.
I am going to paint the back of the sign with another design to make it reversible so sign up for my newsletter to get notified when that is posted. (if you download the sign pattern it signs you up for the newsletter or use the box in the sidebar)
Once the other side is done I will get this hung in my dining room and I will share some photos of it in place, but first I need to paint my walls!
Happy Painting!

You Will Also Enjoy
Harvest Sign and How to Paint Lettering
How to Use Crackle Medium
Painting Patterns & E-books
How to Age New Wood in 4 Easy Steps
DIY Workbench


You are very welcome Norma. 🙂
Very nice and thank you for the diy info